# Contributing to documentation
We organize our documentation with the actual 4App source code in one Git repository. By convention the 4Apps root folder contains a docs folder, where all the documentation for the specific 4App goes. Please have a look at the sample project to get a basic understanding: 4App Sample (opens new window). There is also a technical explanation on how it works.
If you aren't familiar with Git and Git-Flow, have a look at: Working with Git.
# Structure
We divide 4App documentations into the following categories:
- Configure
- Configure contains information for administrators to configure, load-balancer, SMTP, Databases, Logging etc. and how to get metrics and monitoring set up.
- Customize
- Customize contains information and tutorials to customize the 4ALLPORTAL using 4Apps and modules.
- Development
- Documentation related to 4App development.
- Installation
- Installation should contain instructions to install the 4ALLPORTAL.
- Release notes
# Inserting images
When inserting an image, copy it to a folder called assets, next to the .md file. Please use relative paths to link them. For example: . The ./ prefix is important for the static page generator "vuepress".
# Language
- US English
- We use an automatic workflow to translate to german. The source language is always US English.
# Capitalization
- Capitalize all letters in 4ALLPORTAL
- When to use capital letters (Titles, Labels, Buttons) TODO
# Links
Create links relative to your current file. For example: README [README](../README.md)
# Writing
- Write in Markdown
- Use dashes (
-) for files and folders (Example:request-management.md) - Only add one H1 headline to each document
- Use soft wrapping for texts
- Insert an empty line after and before each headline
- Use common contractions
# Generate locally
To locally preview the documentation, we usually add a docker-compose file to each repository. Make sure your system has Docker Compose installed (Install Docker Compose (opens new window)). Also check Working with Git.
Start:
cd cloned-repo/docs
docker-compose up -d
Restart:
docker-compose restart
# Working with Git-Flow
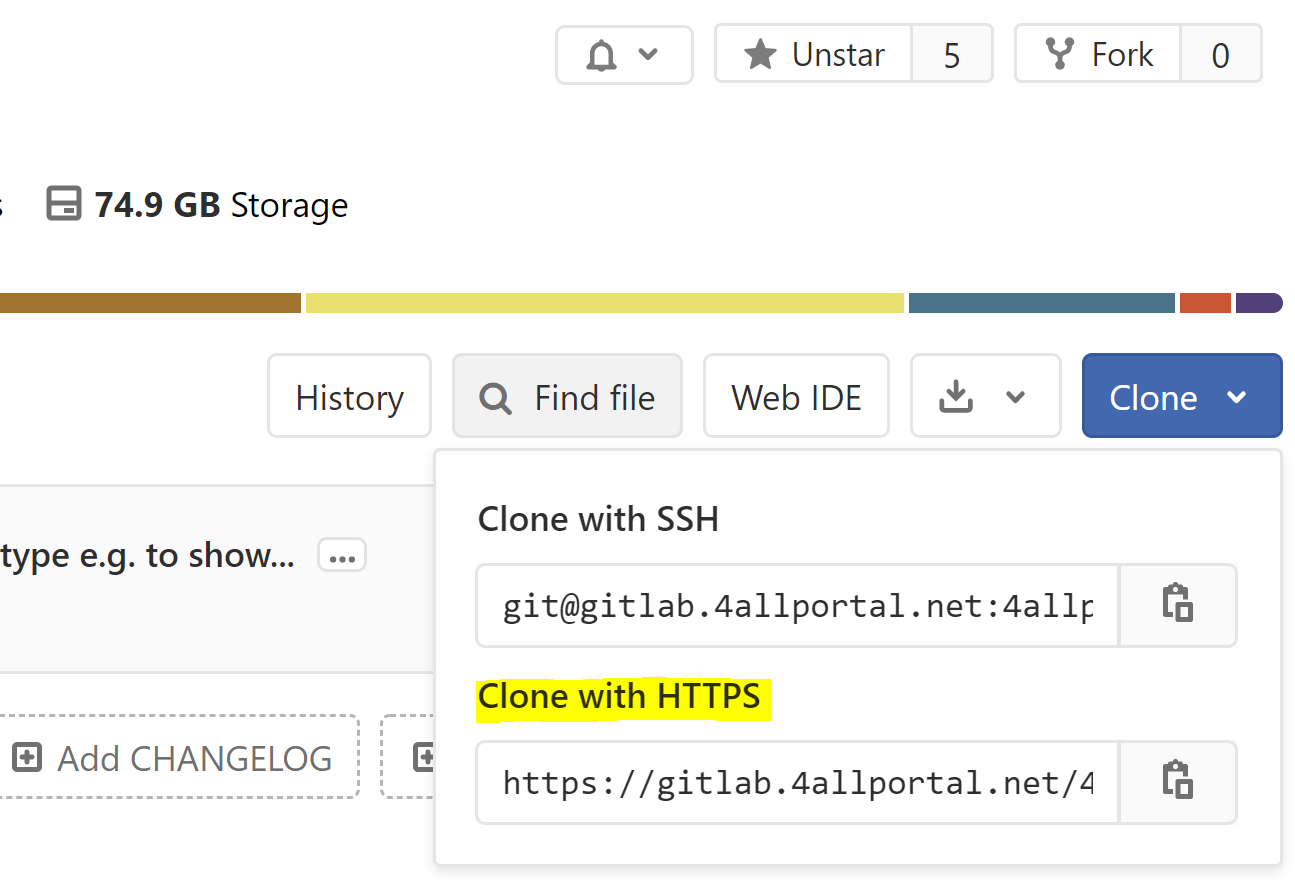
Before you can edit or create files, clone the repository to your local system. You either achieve that by using the terminal git clone <clone-url> or with a UI like Intellij. In Intellij hit File->New->Project from Version Control.... Select Git and insert your clone-URL into the URL field. You can obtain the clone-URL from the 4App project home in GitLab. Other services like Github or Bitbucket should be similar.
After cloning, there is a folder with the repository you cloned. At 4ALLPORTAL we use git-flow as a Git branching model. If you use a different branching approach, skip the rest of this section.
First of all, make sure your current branch set to develop. Intellij shows that in the lower right corner. From the terminal, use the command git status. To switch the branch either use git checkout develop or in Intellij click on the current branch in the lower right corner, select develop and click checkout from the dropdown.
After that, create a branch with the following pattern: feature/short-name. When working on a ticket from your issue-tracker, you should also append the ticket id. Make sure you checkout the new branch. Now you are ready to edit or create documentation.
When editing, commit your changes every once in a while. At the end of the day or after finishing your work, push your changes to the server. When you think your branch is ready to merge, create a merge request.
- Commit
- Terminal:
git commit . -m "docs: message" - Intellij:
VCS->Commit...
- Terminal:
- Push
- Terminal:
git push origin feature/short-name - Intellij:
VCS->Git->Push...
- Terminal:
To create a merge or pull request, navigate to the Git-web-UI. GitLab will prompt with a link to create a merge request for your newly pushed changes.