# Digital Rights and Traffic Lights
With digital rights, you can control the download of each file in the DAM, e.g. depending on its rights status. No file can be quick-downloaded, added to the shopping cart or shared without an automatic action happening. Digital rights also prevent editing of locked files, e.g. image or video editing would not be possible.
With an active digital rights configuration, a pop-up window appears as soon as a user wants to download or edit a file. This pop-up can have different layouts and functions, e.g.:
- a simple information pop-up for a free to use file
- a pop-up to accept the terms of usage before downloading for a restricted file
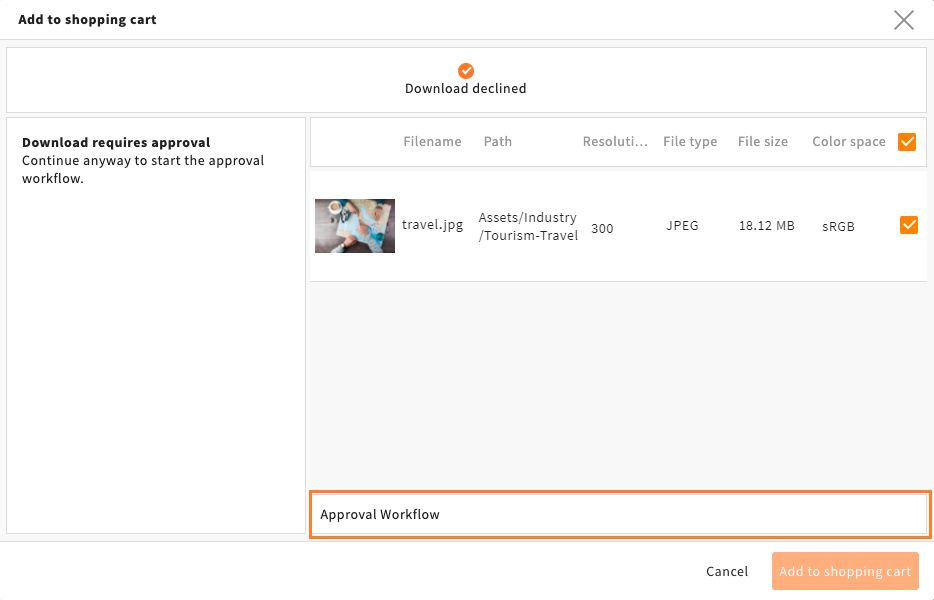
- or a pop-up starting an approval workflow for a restricted file

Pop-up to accept the terms of usage for a restricted file
 The component digital rights is chargeable.
# How Do Digital Rights Work?
Digital rights work with conditions that check a file's rights status and/or take the requesting user's role into account. The corresponding field and value options must already exist in your system.
Conditions are configured using one of the system's six possible permission types.
Each permission type results in a corresponding pop-up window with differing information and options and requires a separate configuration. The following permissions are possible:
SQL conditions
Please note: You can work with SQL conditions. They will work now, but will not be supported in future upgrades. We suggest working with SQL free conditions.
# Possible Scenarios
Here are some possible scenarios for the usage of digital rights:
| Role | Description | Usage rights | Permission Type |
|---|---|---|---|
| Administrators | No restrictions for this role | role has all rights | allow |
| Marketing | Users have to accept special usage rights | Download restricted | accept |
| Web design | Users have to comment a statement for usage | Download restricted | usage_statement |
| Sales | Users have to request files using the approval workflow | Download restricted | approval |
| Service | No download allowed for users of this role | Download locked | deny |
# Digital Rights? Traffic Lights? What is the Difference?
Digital rights are independent of the "traffic lights". Traffic lights are a visual information for the user, showing the rights' status of an asset, e.g.:
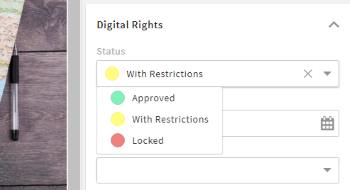
Traffic lights are configured as a CEVarchar field with value options, e.g. "Approved", "With Restrictions" and "Locked".
The digital rights' configuration may use the value options from this (or any other) field to prevent a download.
Learn how to configure traffic lights here.
# How to Configure Digital Rights
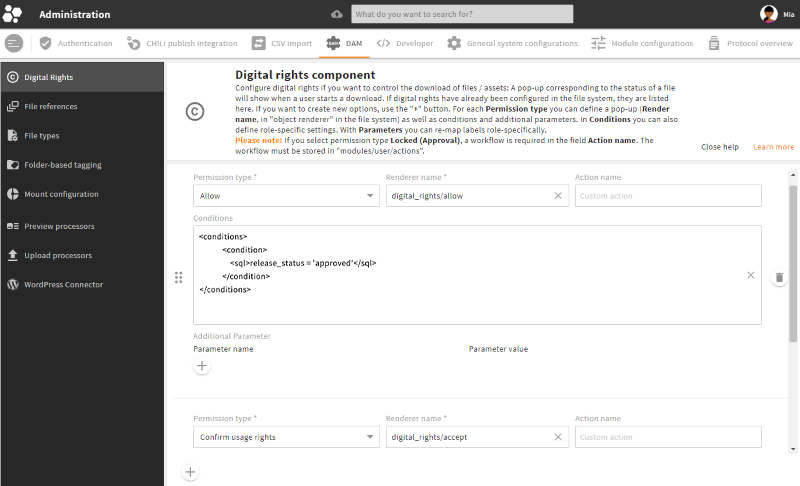
To configure digital rights, go to snap-in DAM/Digital Rights in the administration area.
All settings you make in this snap-in will be stored in file digital_rights.xml, in folder custom/modules/file in your filesystem.
Please note: You can make all digital rights configurations in this snap-in. Only custom pop-up renderers or approval workflows require an extra configuration.
![]()
If you have not yet configured digital rights here or in an XML file
If you already have configured digital rights here or in an XML file
# Configure a Permission
To configure a permission, click the + button in the lower left corner. Each configured permission results in a corresponding pop-up.
Make your settings in the following fields:
| Name | XML Field Name | Description |
|---|---|---|
| Permission type | name | Choose the type you want to define a condition for (permission type details). |
| Renderer name | renderer_name | Assign a special simple renderer that defines the pop-up list view (digital_rights/{permission type name}, e.g. "digital_rights/allow"). If you do not define any custom renderer here, a default renderer will be used. |
| Action name | action_name | Name of an individual action. Required for permission type "approved". You can enter the name of an approval workflow here. |
| Conditions | conditions | Enter a condition (opens new window) here to determine when this permission should apply. You can refer to any value option or field or user role (example conditions). |
| Additional Parameter | Enter a parameter name and a parameter value here, e.g. a label key, to customize the texts in this pop-up (parameter details). |
Please note: Each pop-up requires the configuration of a separate permission. If you want to customize your pop-up texts using parameters, you need to configure a permission for each required pop-up version.
# Permission Types
Conditions for downloading or editing files can be defined using one of six possible permission types. Each of these types results in a different pop-up shown to the user.
Please note their differing XML type names (used e.g. for the renderer):
| Name | XML Value |
|---|---|
| Allow | allow |
| No usage rights | confirm |
| Confirm usage rights | accept |
| Usage statement | usage_statement |
| Locked (Approval) | approve |
| Locked | deny |
# Allow
If you choose "allow", no pop-up appears. The file is free to use. The download starts directly.
# No usage rights
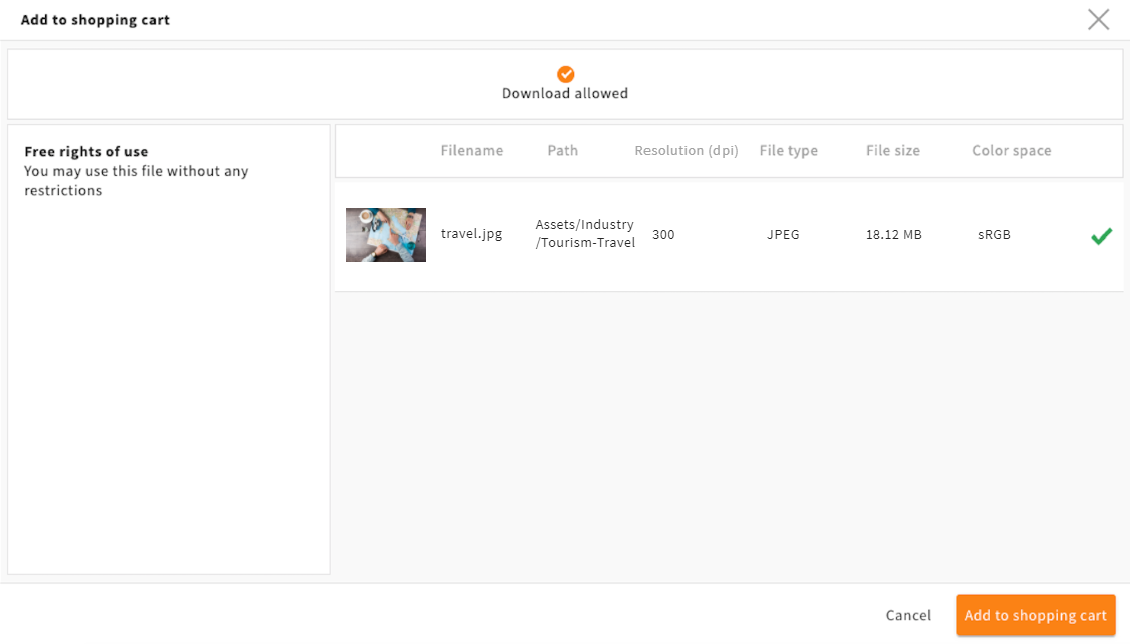
If you choose "No usage rights", an information pop-up appears. The file is free to use. The user can download the file without usage restrictions.
# Confirm usage rights
If you choose "Confirm usage rights", a pop-up appears. The file has usage restrictions. The user must accept the terms of use by ticking the checkbox. After that, the user can download the file.
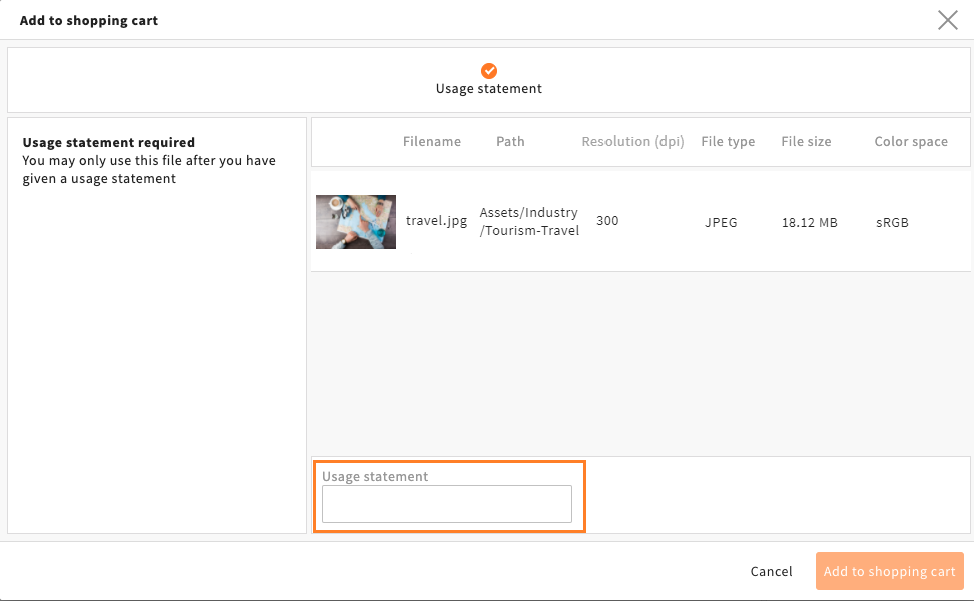
# Usage statement
If you choose "Usage statement", a pop-up appears. The file has restrictions. The user must define the usage purpose in a statement field. After that, the user can download the file.
# Locked (Approval)
If you choose "Locked (Approval)", a pop-up appears. The file is locked. The user cannot download the file. The user gets the possibility to start an approval workflow for the required file. The user responsible for file approval receives a task and an email notification. They can approve the request and confirm the usage depending on a special download profile.
Learn how to configure an approval workflow here.
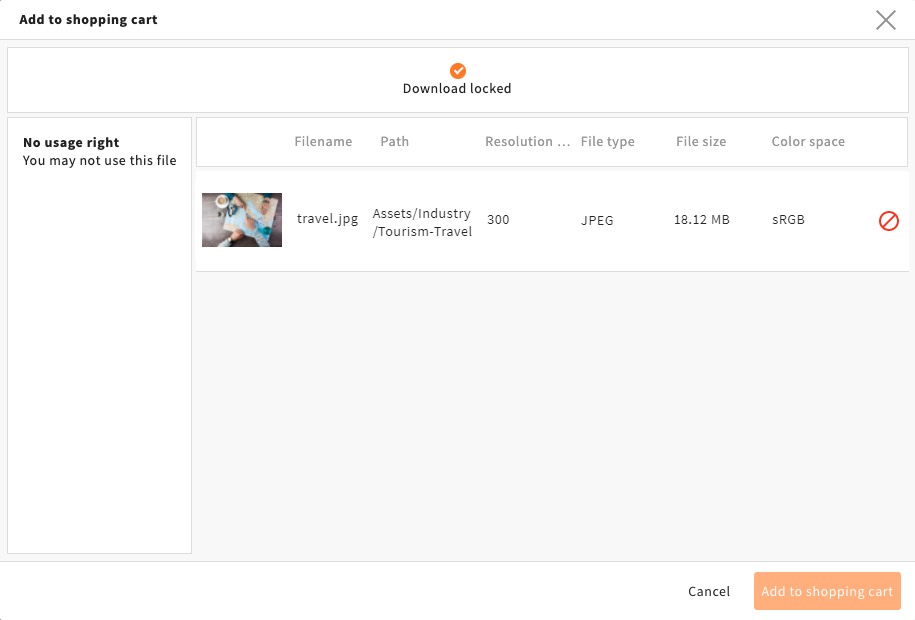
# Locked
If you choose "Locked", an information pop-up appears. The file is locked. The user cannot download the file.
Fallback: If none of the set conditions apply for a file, the fallback is "deny".
# Permission Order
The order of permissions in your snap-in resembles the order in the XML file.
You need to configure your permissions in descending order: First define the type with the most rights, e.g. "Allow", and at last type "Locked".
The system follows this order when checking for digital rights. As soon as the conditions of the first block match, its settings apply. You can move your blocks using the drag button on their left:

:::
# Permission Examples with and without SQL
A block from your snap-in could look like this in the digital_rights.xml:
- Without SQL
<type>
   <name>{typename}</name>
   <conditions>
    <condition>
        <value1 type="field">
          <value>status</value>
        </value1>
        <operator>=</operator>
        <value2>
          <value>allowed</value>
        </value2>
    </condition>
   </conditions>
   <action_name>action_name</action_name> <!-- only for type approve -->
   <renderer_name>digital_rights/{typename}</renderer_name>
   <parameter/>
</type>
- With SQL
<type>
   <name>{typename}</name>
   <conditions>
      <condition operator="and">
         <group>default</group>
         <operator>=</operator>
         <sql>release_status='with_restrictions'
            AND
            '{$currentUser.role.roleName}'='User'
         </sql>
      </condition>
   </conditions>
   <renderer_name>digital_rights/{typename}</renderer_name>
</type>
# Customizing Permission Type Pop-ups
The texts in the six possible pop-ups like shown above are the system default. They can be changed, e.g. to display role-specific texts, using parameters.
A permission may also include a customizable renderer for the pop-up layout, as well as an optional action (e.g. to start an approval workflow).
# Parameter and Custom Labels
The system default pop-up texts are stored in file trafficlights.properties in folder 4allportal-dam/modules/filetransfer/locale/en_US.
If you want to change the default, e.g. to enter a specific headline for a specific role, you need to configure new parameters:
Just click the
+button below "Parameter name" to open two new fields:

Enter the name of the text element you want to customize in field "Parameter name".
Enter the label key of the text element you want to customize in field "Parameter value".
Go to your custom folder and translate your label key(s) in a new .properties file, e.g.
custom-digital-rights-pop-up-texts.properties. Make sure the file name is unique.
| Name | Description |
|---|---|
| Parameter name | Specify the parameter name, e.g. the text element you want to customize. Default text elements:
|
| Parameter value | Enter the parameter value, e.g. a label key for the specified text element, always complemented with the chosen permission type (in uppercase). Default label keys:
|
For more details on labels and their translation, take a look here (opens new window).
# Approval Workflow for Digital Rights
First of all, the installation of 4App File Approval Workflow (opens new window) (4allportal-file-approval-workflow) is required.
The approval workflow itself works without any custom configuration.
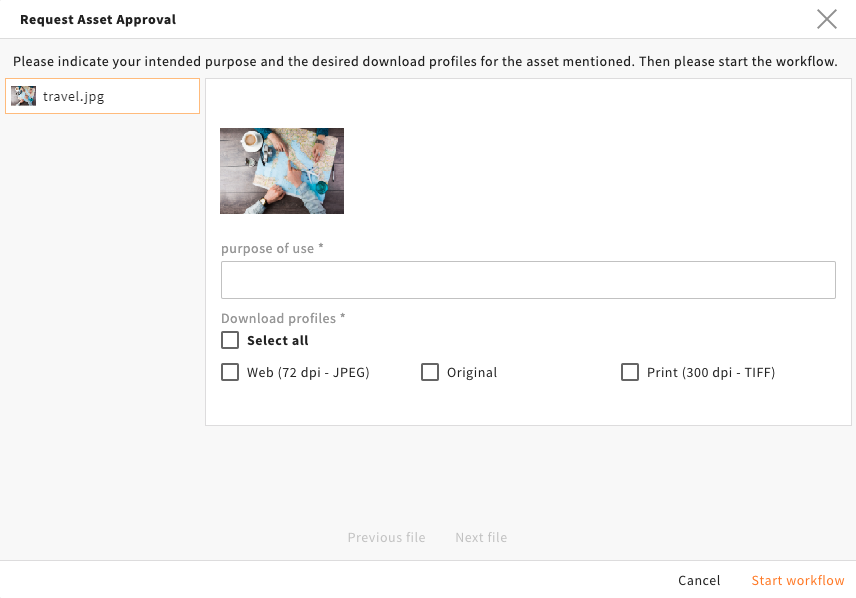
After you have confirmed the digital rights pop-up for the approval workflow, another pop-up appears. It requires a purpose of use as well as the requested download profiles:
When the user starts the workflow, the 4ALLPORTAL automatically creates a task for the inquirer as well as the approver, and an e-mail is sent to both of them.
The approver can now approve the request in their tasks:
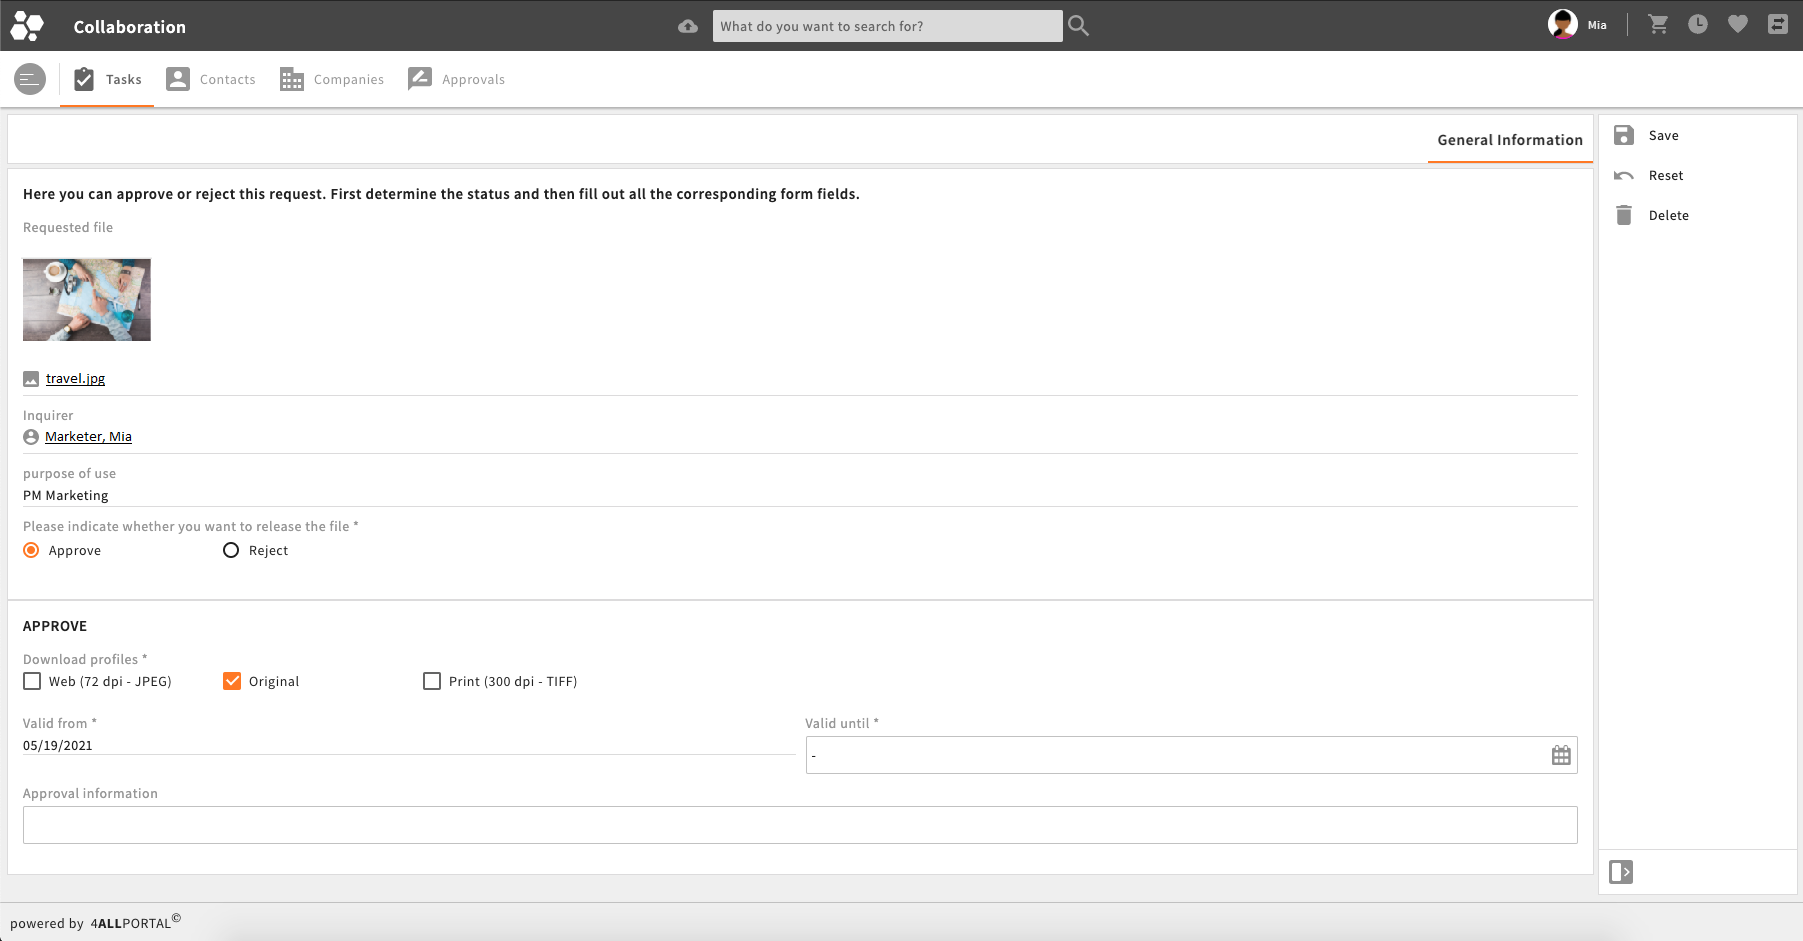
After the approver has approved the request, the inquirer receives a second e-mail with all information about the approval. The inquirer is now able to download the approved file within the assigned task.
The configuration of the approval workflow can be set in admin snap-in DAM/Approval configuration:
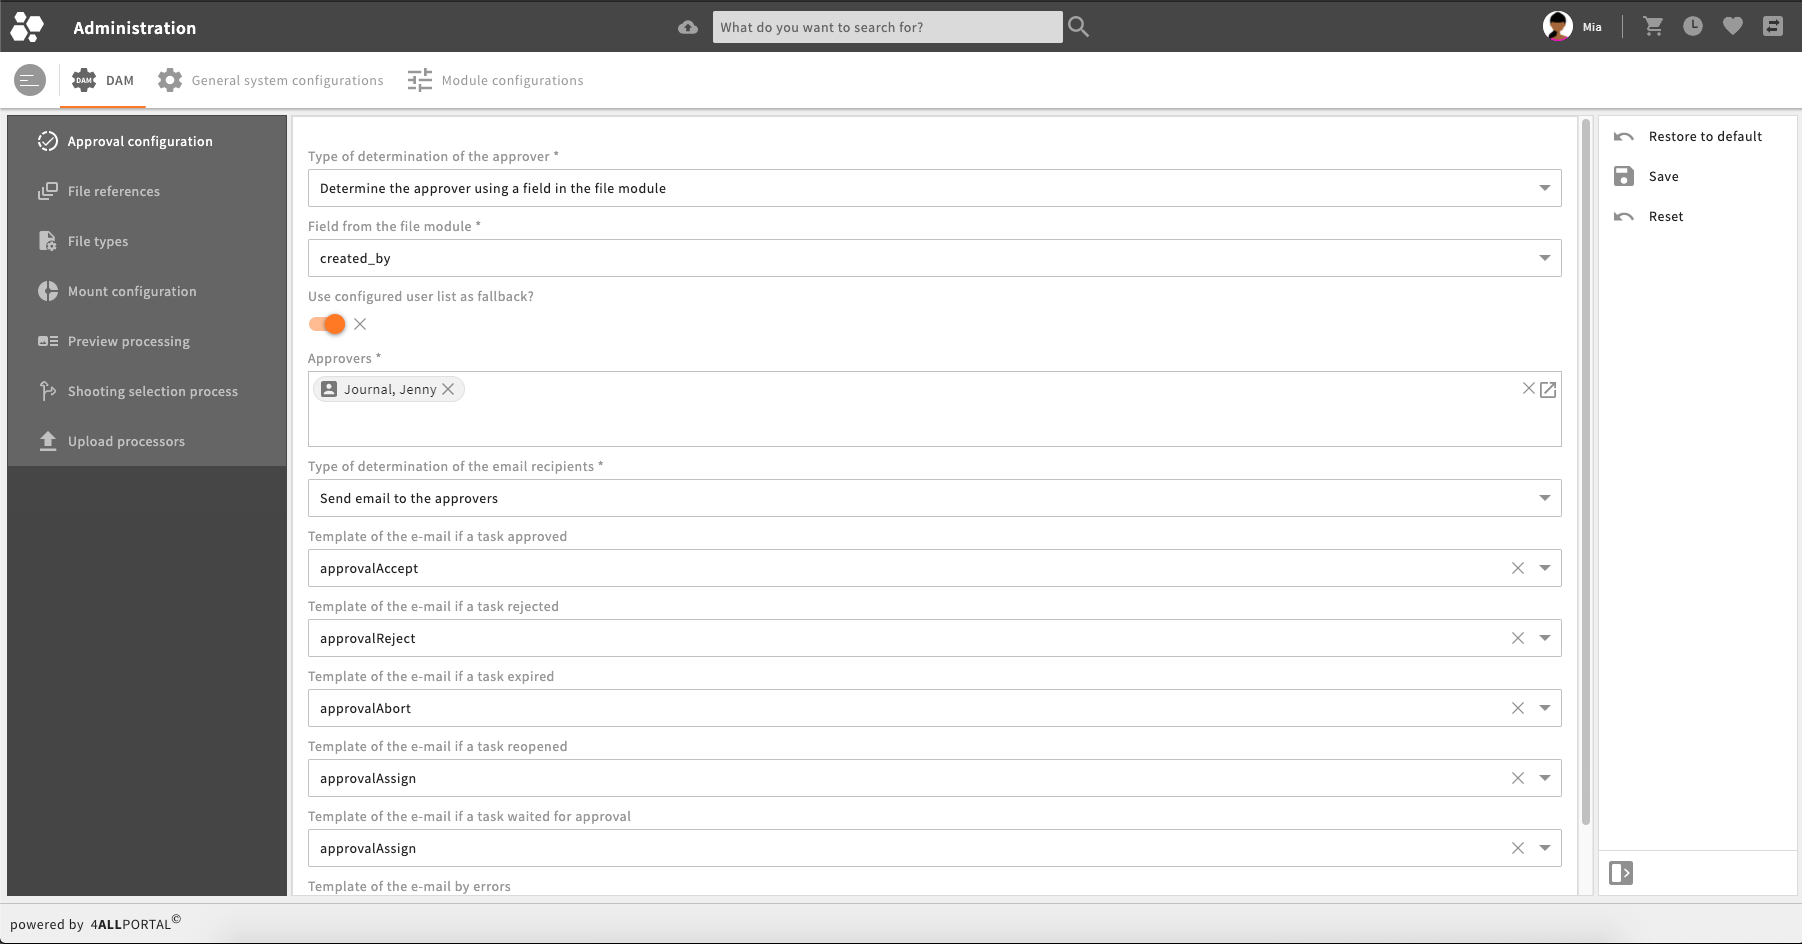
Users with the permission to approve can be set either in a predefined list, or a specific CEId(List) field within the approved file.
# How to Configure Traffic Lights
Traffic lights set and visualize the rights status of a file. The values from this field can then be used in a digital rights condition.
We usually configure a regular CEVarchar field with value options for the visualization of the traffic lights, e.g.:
To implement traffic lights like seen above to your system, follow these four steps:
1. Create a new field, e.g. release_status
<field>
 <is_native>true</is_native>
 <type>CEVarchar</type>
 <length>255</length>
 <audit>true</audit>
</field>
2. Create a value option, e.g. release_status_values
<keys>
  <key>approved</key>
  <key>with_restrictions</key>
  <key>locked</key>
</keys>
3. Create an object renderer to implement both
<field_renderer>
    <type>Selection</type>
    <value_option_key>release_status_values</value_option_key>
   <field_renderer_attributes>
      <entry class="string" key="visual_type">dropdown</entry>
      <entry class="boolean" key="show_icon">true</entry>
   </field_renderer_attributes>
   <field>
      <name>release_status</name>
   </field>
</field_renderer>
4. Define icons
V-RELEASE_STATUS_VALUES-APPROVED.4apicon
V-RELEASE_STATUS_VALUES-WITH_RESTRICTIONS.4apicon
V-RELEASE_STATUS_VALUES-LOCKED.4apicon
Please note: Icons must be .svg or .png files.
# Traffic Lights on the Tile View
Optional, you can display traffic lights on the tile view in the file module:

To implement traffic lights to your tile view, use your existing digital rights field and value option configuration. Follow these four steps:
# Step 1
Check your existing digital rights field and value option configuration.
You need to know the name of the metadata field for the digital rights status (e.g., release_status) as well as its assigned value option name.
# Step 2
Modify the object renderer for the tile view in the file module.
Add a new field renderer to the object renderer configuration of the tile view. You can copy this template to your custom configuration in custom/modules/file/object_renderer/simple/tile/id_additional.4aprenderer:
     <field_renderer>
         <type>Selection</type>
         <value_option_key>release_status_values</value_option_key>
       <field_renderer_attributes>
           <entry key="show_icon" class="boolean">true</entry>
           <entry key="show_label" class="boolean">false</entry>
       </field_renderer_attributes>
       <field>
         <name>release_status</name>
       </field>
     </field_renderer>
Metadata Icon List
If you have customized your tile view with multiple status icons, you can also add the traffic lights to your already customized metadata-icon-list (opens new window) component.
# Step 3
Define or modify icons.
If required, you can create your own SVG image per permission in your filesystem's style folder /custom/modules/file/styles/default. We suggest creating small SVGs within 180 px height/width. Name the icons after the defined value options. The SVG file suffix should be renamed to ".4apicon":
V-{VALUE-OPTION-FILE_NAME}-{RIGHTS-VALUE}.4apicon
# Example XML File
In the following example we attached the condition to a traffic lights field ("release_status") and the currentUser.role.roleName for every type.
<digital_rights>
   <type>
      <name>allow</name>
      <conditions>
         <condition>
            <sql>release_status = 'approved'</sql>
         </condition>
   </conditions>
   <renderer_name>digital_rights/allow</renderer_name>
  </type>
  <type>
      <name>confirm</name>
      <conditions>
        <condition>
           <sql>release_status = 'with_restrictions'
                AND
                {$currentUser.role.roleName}' = 'Admin'</sql>
        </condition>
      </conditions>
   <renderer_name>digital_rights/confirm</renderer_name>
  </type>
  <type>
      <name>accept</name>
      <conditions>
        <condition>
          <sql>release_status = 'with_restrictions'
               AND
               '{$currentUser.role.roleName}' = 'Power User'</sql>
        </condition>
      </conditions>
   <renderer_name>digital_rights/accept</renderer_name>
  </type>
  <type>
      <name>usage_statement</name>
      <conditions>
        <condition>
          <sql>release_status = 'with_restrictions'
               AND
               '{$currentUser.role.roleName}' = 'Marketing'</sql>
        </condition>
      </conditions>
   <renderer_name>digital_rights/usage_statement</renderer_name>
  </type>
  <type>
      <name>approve</name>
      <conditions>
        <condition>
          <sql>release_status = 'with_restrictions'</sql>
        </condition>
      </conditions>
   <action_name>start_approval_workflow</action_name>
   <renderer_name>digital_rights/approve</renderer_name>
  </type>
  <type>
      <name>deny</name>
      <conditions>
        <condition>
          <sql>release_status = 'locked'</sql>
        </condition>
      </conditions>
   <renderer_name>digital_rights/deny</renderer_name>
   </type>
</digital_rights>