# Secret and Token Configuration
To authenticate the connection between CHILI publisher and 4ALLPORTAL API as well as to protect the transfer of sensitive user data, a secret and a secure web token are necessary. Especially if you want to use parameters to allow personalized filter results (e.g. if a web shop is connected to your CHILI publisher), or if you want to work with External Assets.
The 4ALLPORTAL decodes the secure web token and CHILI gets only the personalized user data or use case specific results back.
After installation and before exchanging data, you first need to configure a secret in your 4ALLPORTAL. After that, you have the possibility to create a parameter token e.g. with JWT.io (opens new window).
# 1. Generate a Secret in 4ALLPORTAL
As a default secret, we suggest using a unique 256-bit key. Follow these steps to generate a secret:
- Use an online generator like allkeysgenerator (opens new window) to create a key.
- Copy the resulting 256-bit string to your clipboard.
- Open 4ALLPORTAL admin snap-in
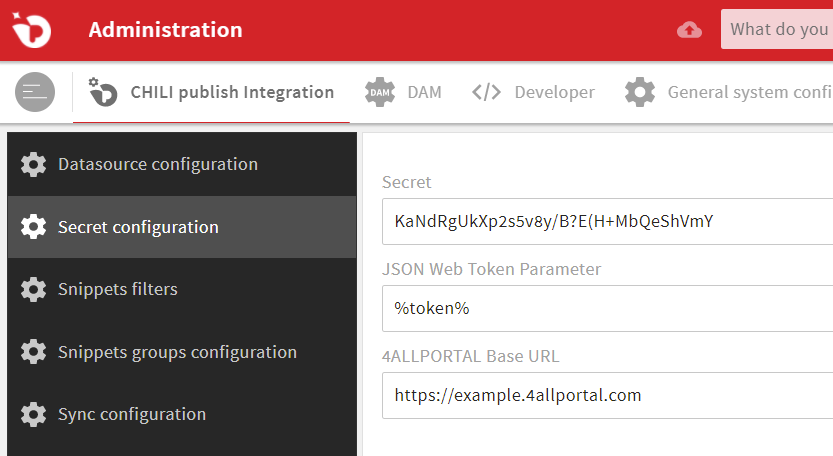
CHILI Publisher Integration/Secret configurationand enter the following:- Field
Secret: Paste the 256-bit string to authenticate. - Field
JSON Web Token Parameter: Create a unique token variable, e.g. "%token%" (more information). - Field
4ALLPORTAL Base URL: Enter your 4ALLPORTAL base URL.
- Field
- Save your changes and clear the configuration cache once.
Example configuration:
# Token Variable
With this variable, you have the possibility to pass parameters, e.g. from a web shop, to CHILI publisher's AssetURL field. You can send calls to the 4ALLPORTAL API to get personalized results like assets or contact data from the dependent web shop user.
Take a look at the CHILIconnector (opens new window) for CHILI with Magento from our technology partner enobis GmbH.
# 2. Testing the API
You can check the API by calling an External Assets filter from the 4ALLPORTAL. If you have not created a filter yet, follow the steps here.
Open an External Assets filter and copy the URL from field Asset List URL for CHILI publisher to your clipboard.
# Test the Default Token Variable
Call the following example URL (using curl, your browser, or a tool like Postman):
https://example.4allportal.com/chili/api/test-filter/assets?token=%token%.
The result of the token "%token%" should be:
<assets>
<item name>="token-test.png"
</assets>
Your own filter URL should work the same. To test is correctly, it must be imported into the document on your CHILI server.
# Test the Token Generation
Generate the token manually using online tool jwt.io (opens new window):
- Go to JWT's Debugger (opens new window).
- Empty all values from field
Payloadon the right side. - Enter your configured 256-bit key to field
Verify signature. - Find the generated token on the left side.
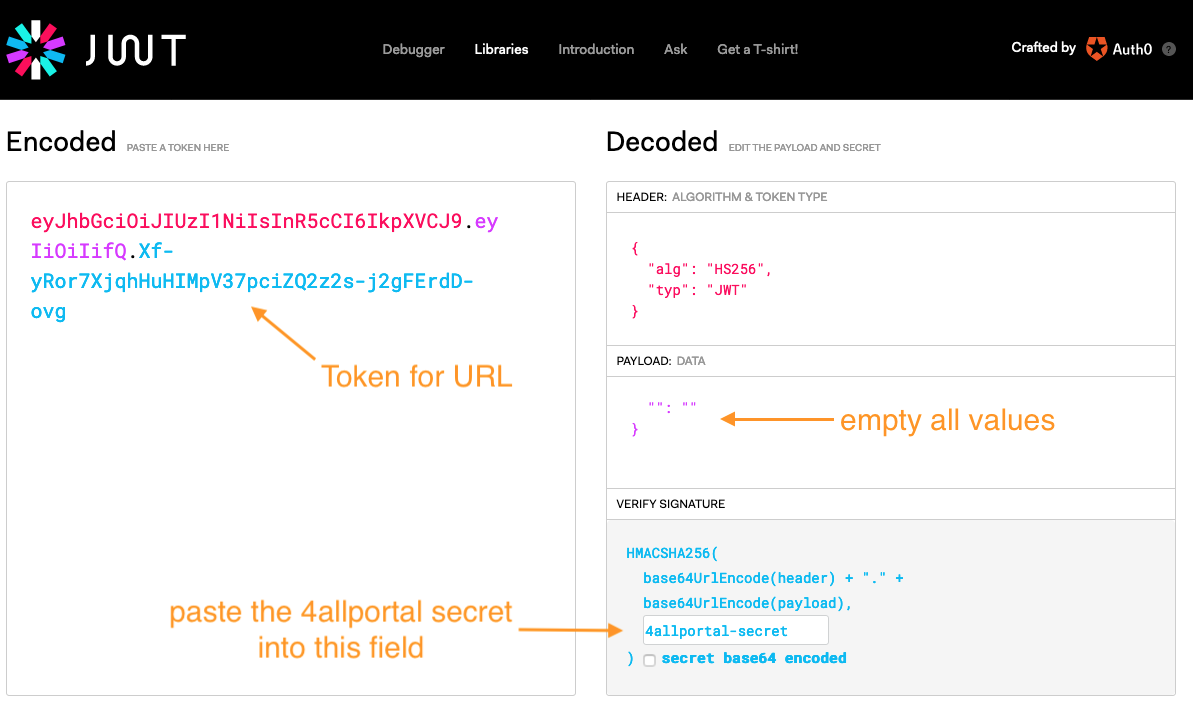
Example URL: https://example.4allportal.com/chili/api/{filter-name}/assets?token={token for URL}
The result of the token "%token%" should be:
<assets>
<item id>= ...
</assets>
To check personalization, enter the name of the metadata field of your filter as the payload parameter key (to the left of the colon in field Payload), and enter the value of the metadata field as the parameter value (to the right of the colon in field Payload).
# Further Configuration
Depending on what you want to do with your CHILI Publisher, you can now configure the use of