# SAML 2.0 Login with Microsoft Azure as Asserting Party (IDP)
To configure Microsoft Azure as Asserting Party, configurations in the 4ALLPORTAL as well as external configurations in Azure are necessary.
# SAML Preconditions
Please note the general SAML preconditions here: SAML preconditions.
# 4ALLPORTAL: Relying Party and Asserting Party
This basic configuration generates the metadata required for the Azure configuration (likely configured by an external IT responsible).
- Configure a SAML2 Relying Party (SP):
- Go to admin snap-in
Authentication/SAML2 Relying Party (SP) - Set
Relying Party IDto a unique ID, e.g. "example40". - Save your Relying Party.
- Click action "Generate Decryption certificate" from the toolbox to generate both
Decryption certificate (X509)andKey for Decryption certificate. - Click action "Generate Signing certificate" from the toolbox to generate both
Signing certificate (X509)andKey for Signing certificate. - Save your settings.
- Go to admin snap-in
Refer Relying Party configuration for detailed information.
- Configure a SAML2 Asserting Party (IDP):
- Go to admin snap-in
Authentication/SAML2 Asserting Party (IDP) - Set
RegistrationId (name)to a unique ID, e.g. "example40_azure". - Set
Relying Partyto previously generated "example40" (via the dropdown). - Save your Asserting Party.
- Click action
Show Metadata URLto copy the Metadata URL or click actionDownload Metadata fileto download the Asserting Party Metadata file for step 4.
- Go to admin snap-in
Refer Asserting Party configuration for detailed information.
Clear the configuration cache in admin snap-in
General system configurations/System settings/Maintenance.Give your Metadata URL or Metadata file to your IT responsible for external Azure configuration.
# External Azure Configuration
For the external part of the configuration, pass the required metadata to your (external) IT responsible. They need to make the following configuration steps:
- Open the Azure admin center and create an enterprise application:
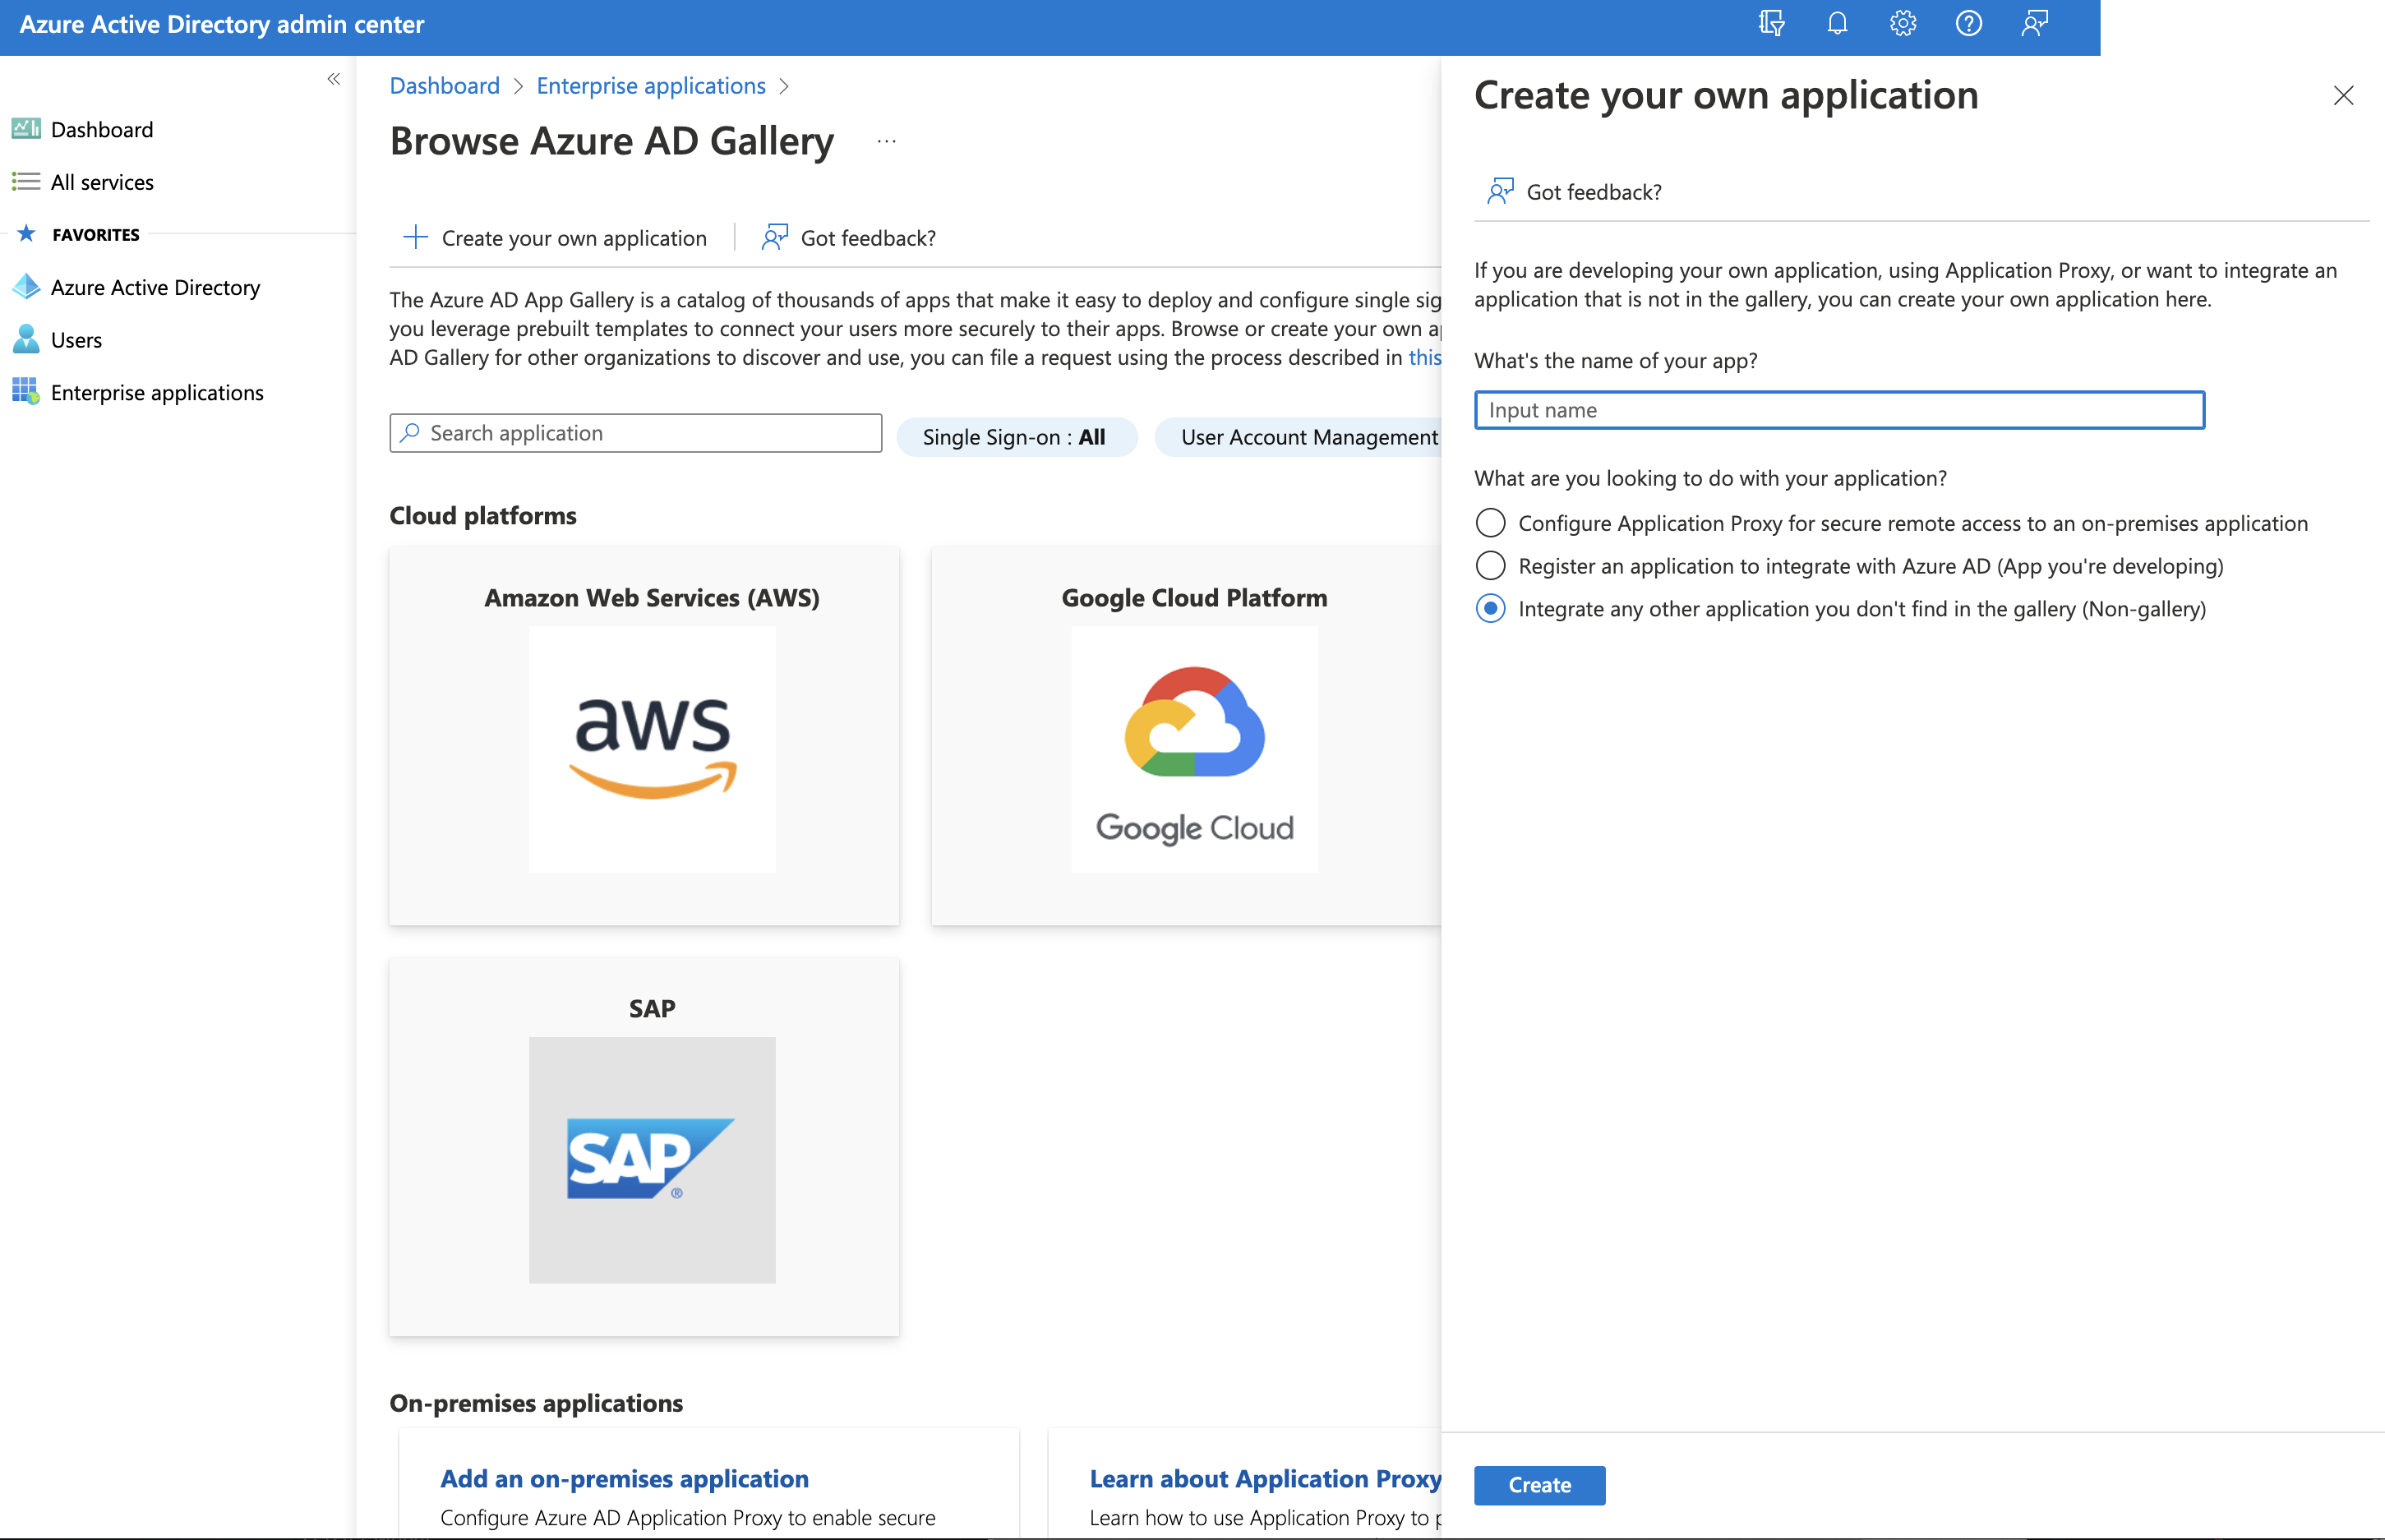
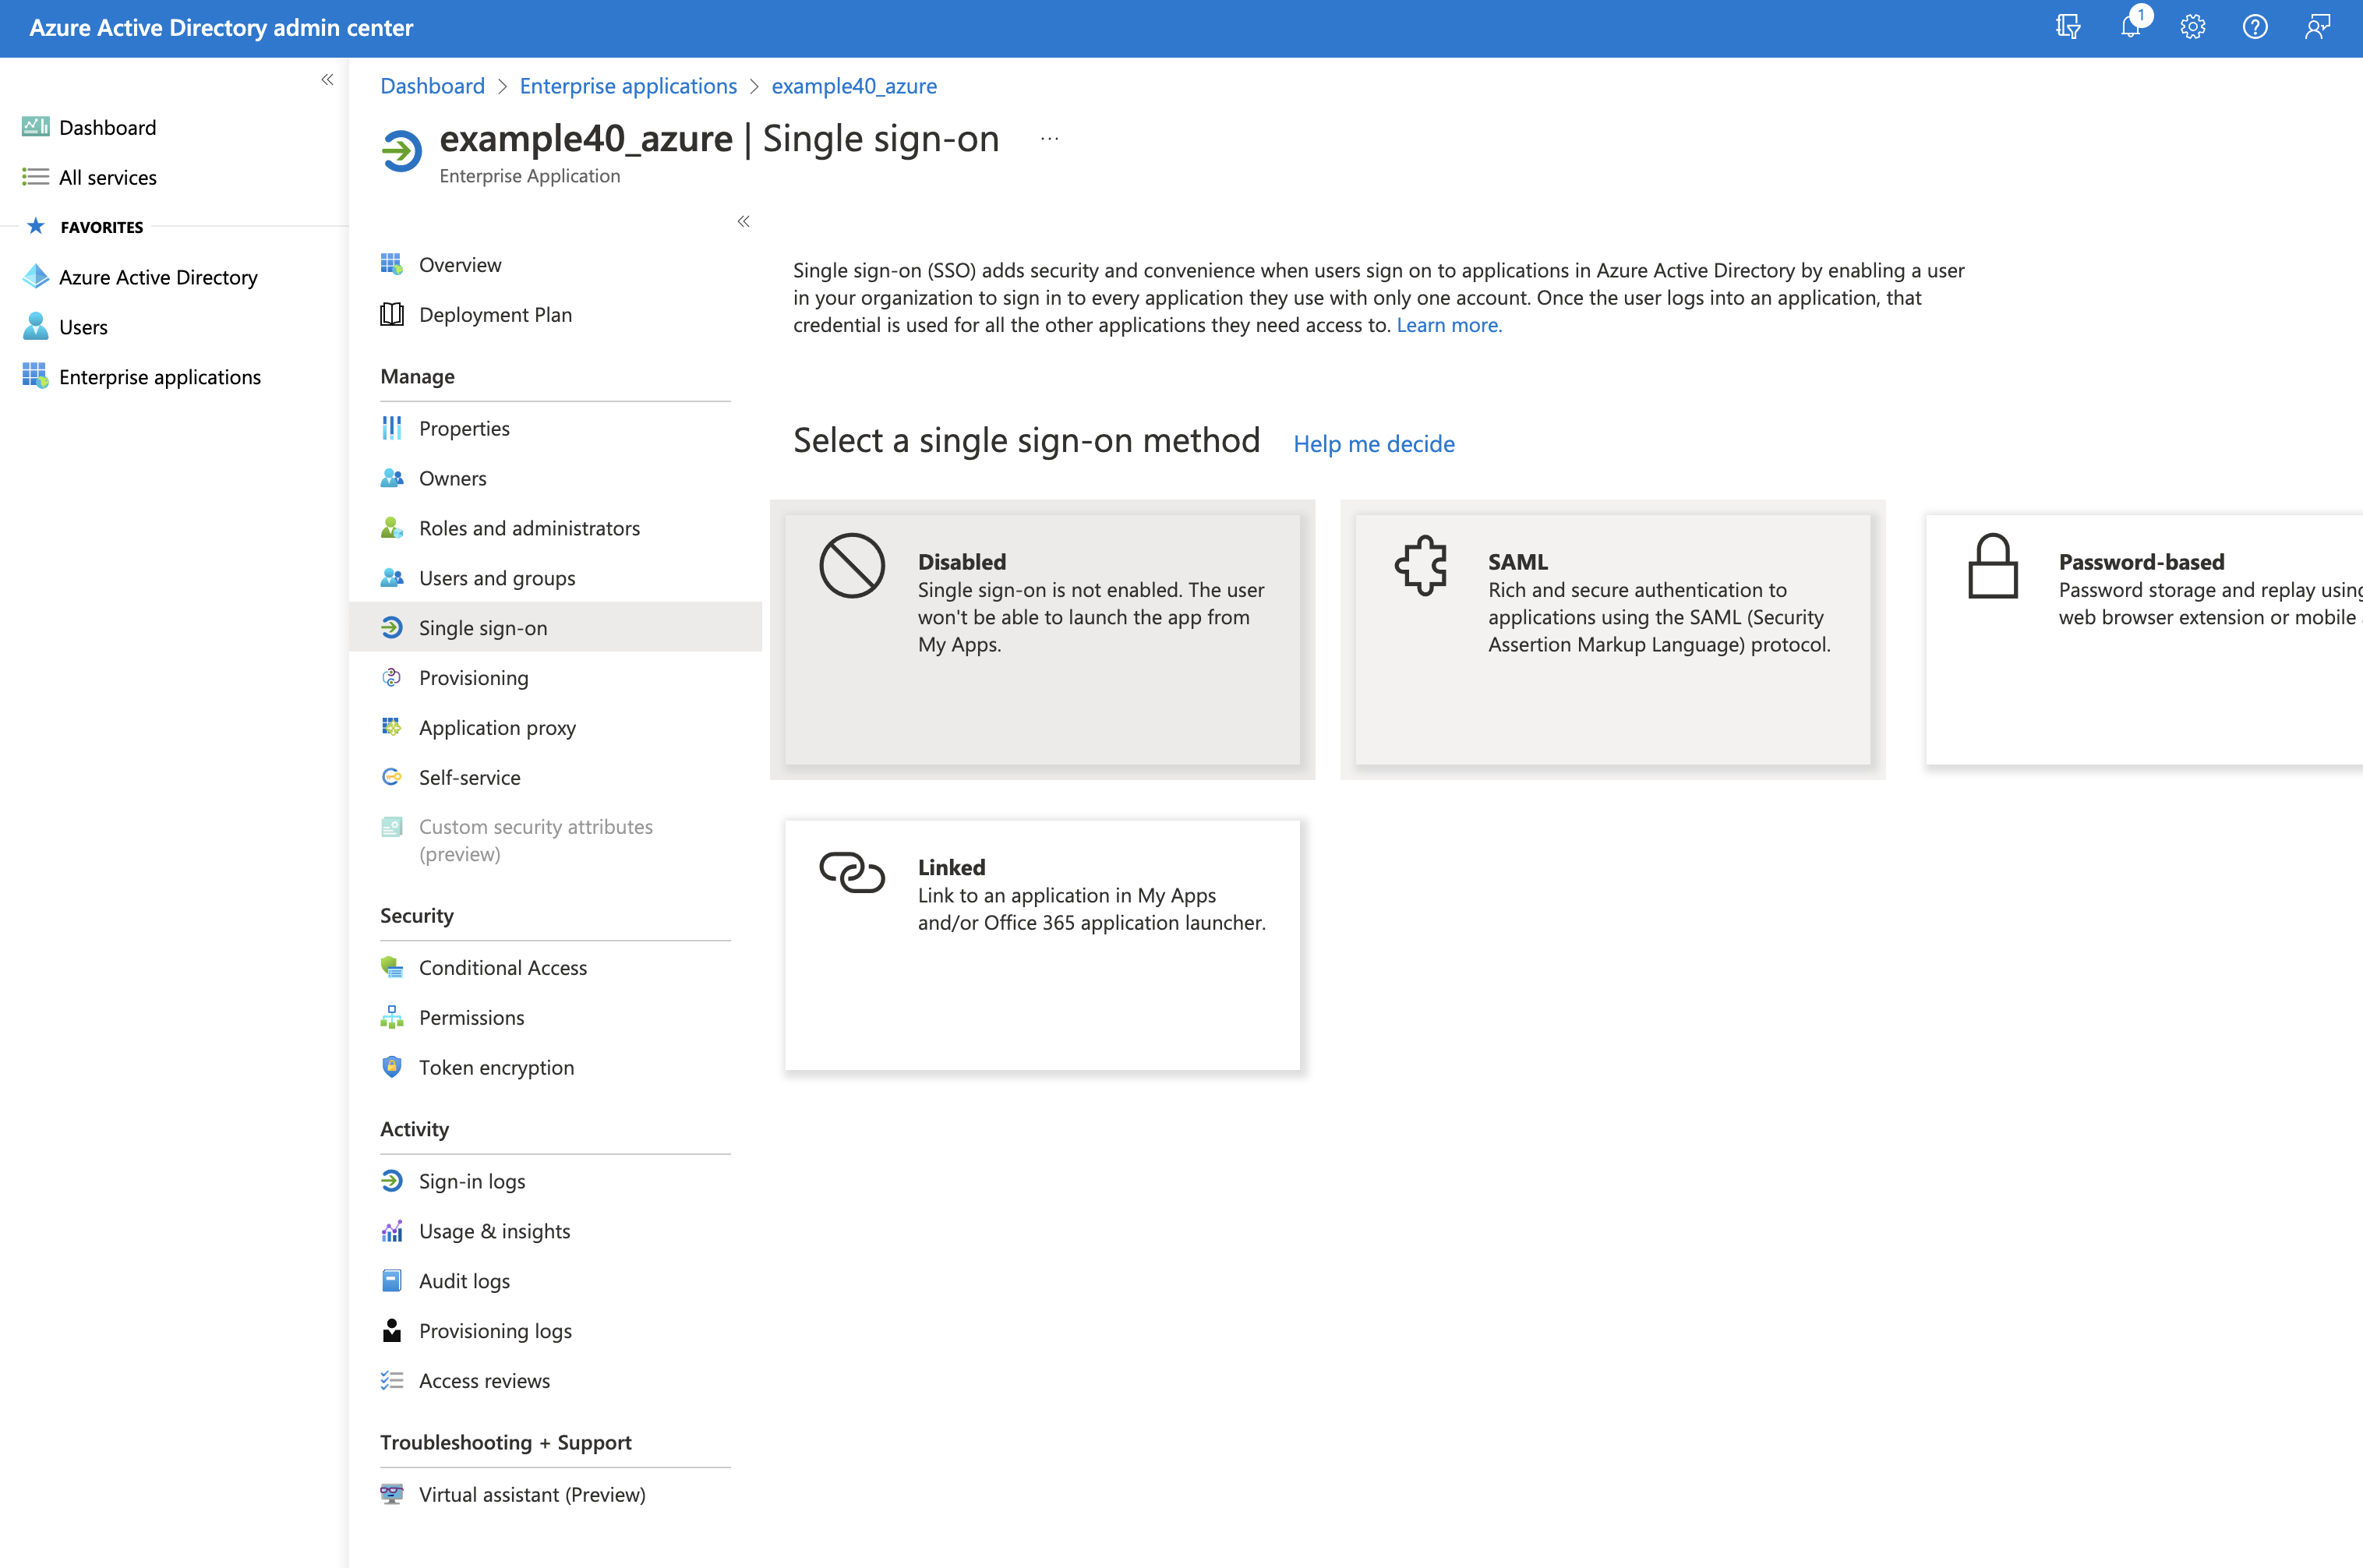
- Select "Single sign-on" and "SAML" authentication:
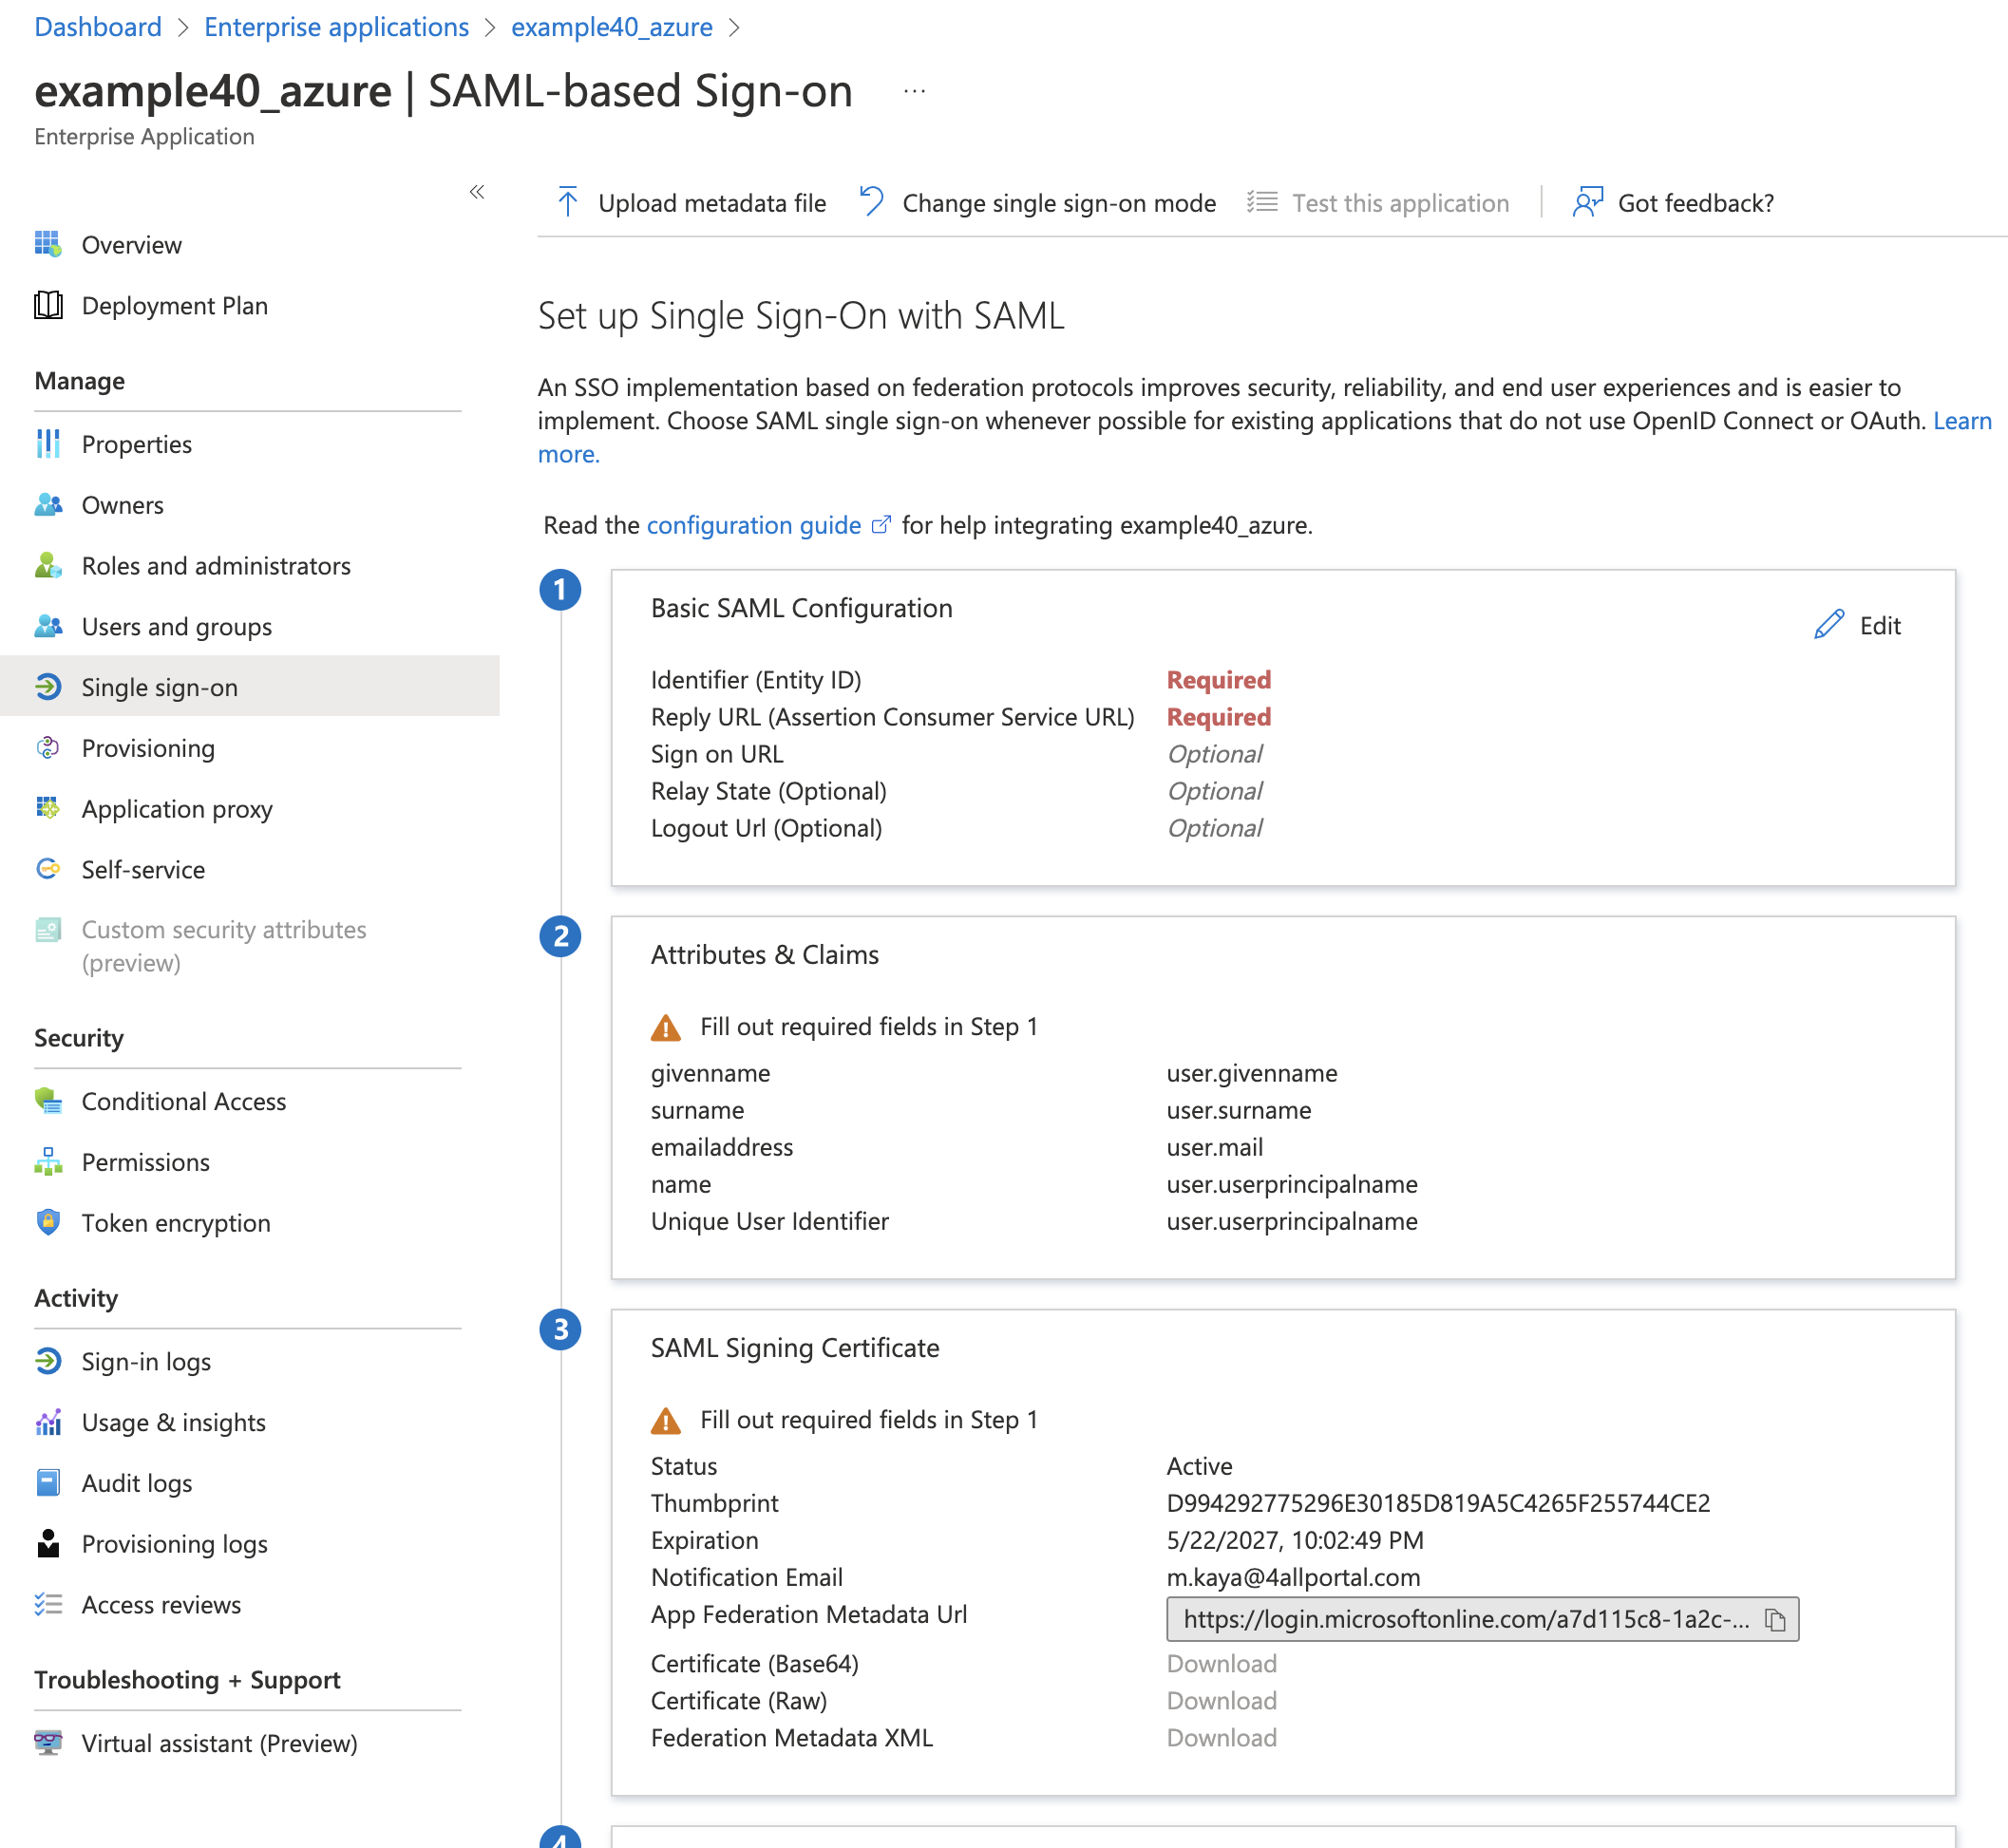
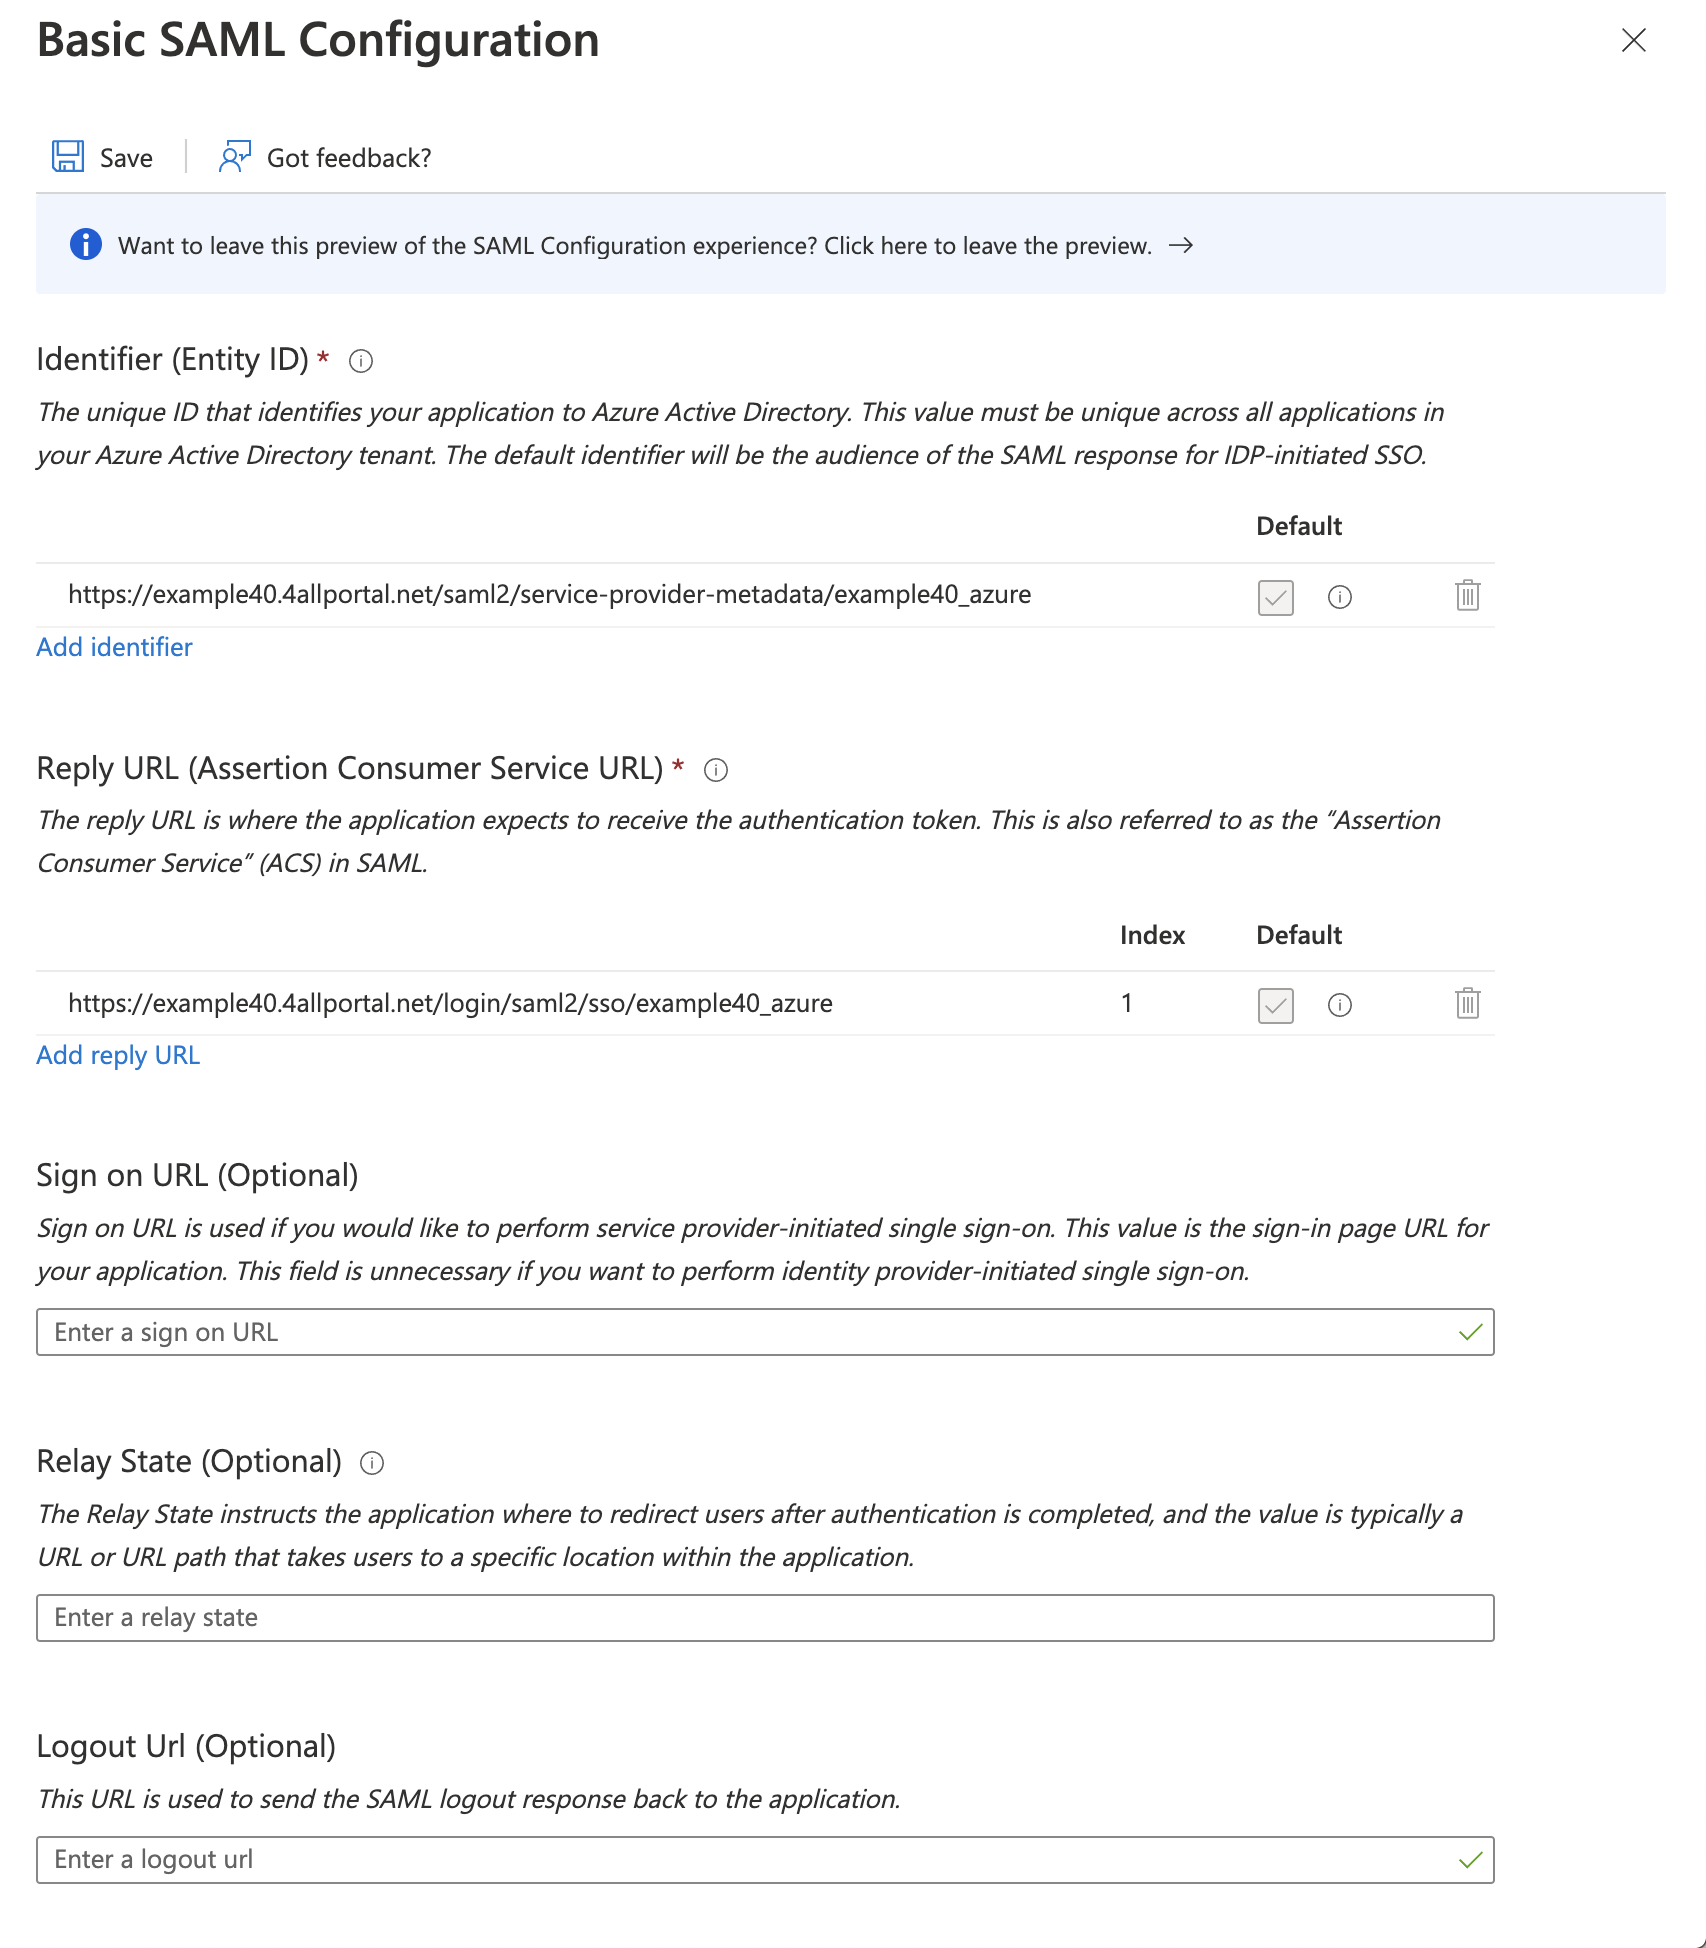
- Make your basic SAML configuration:
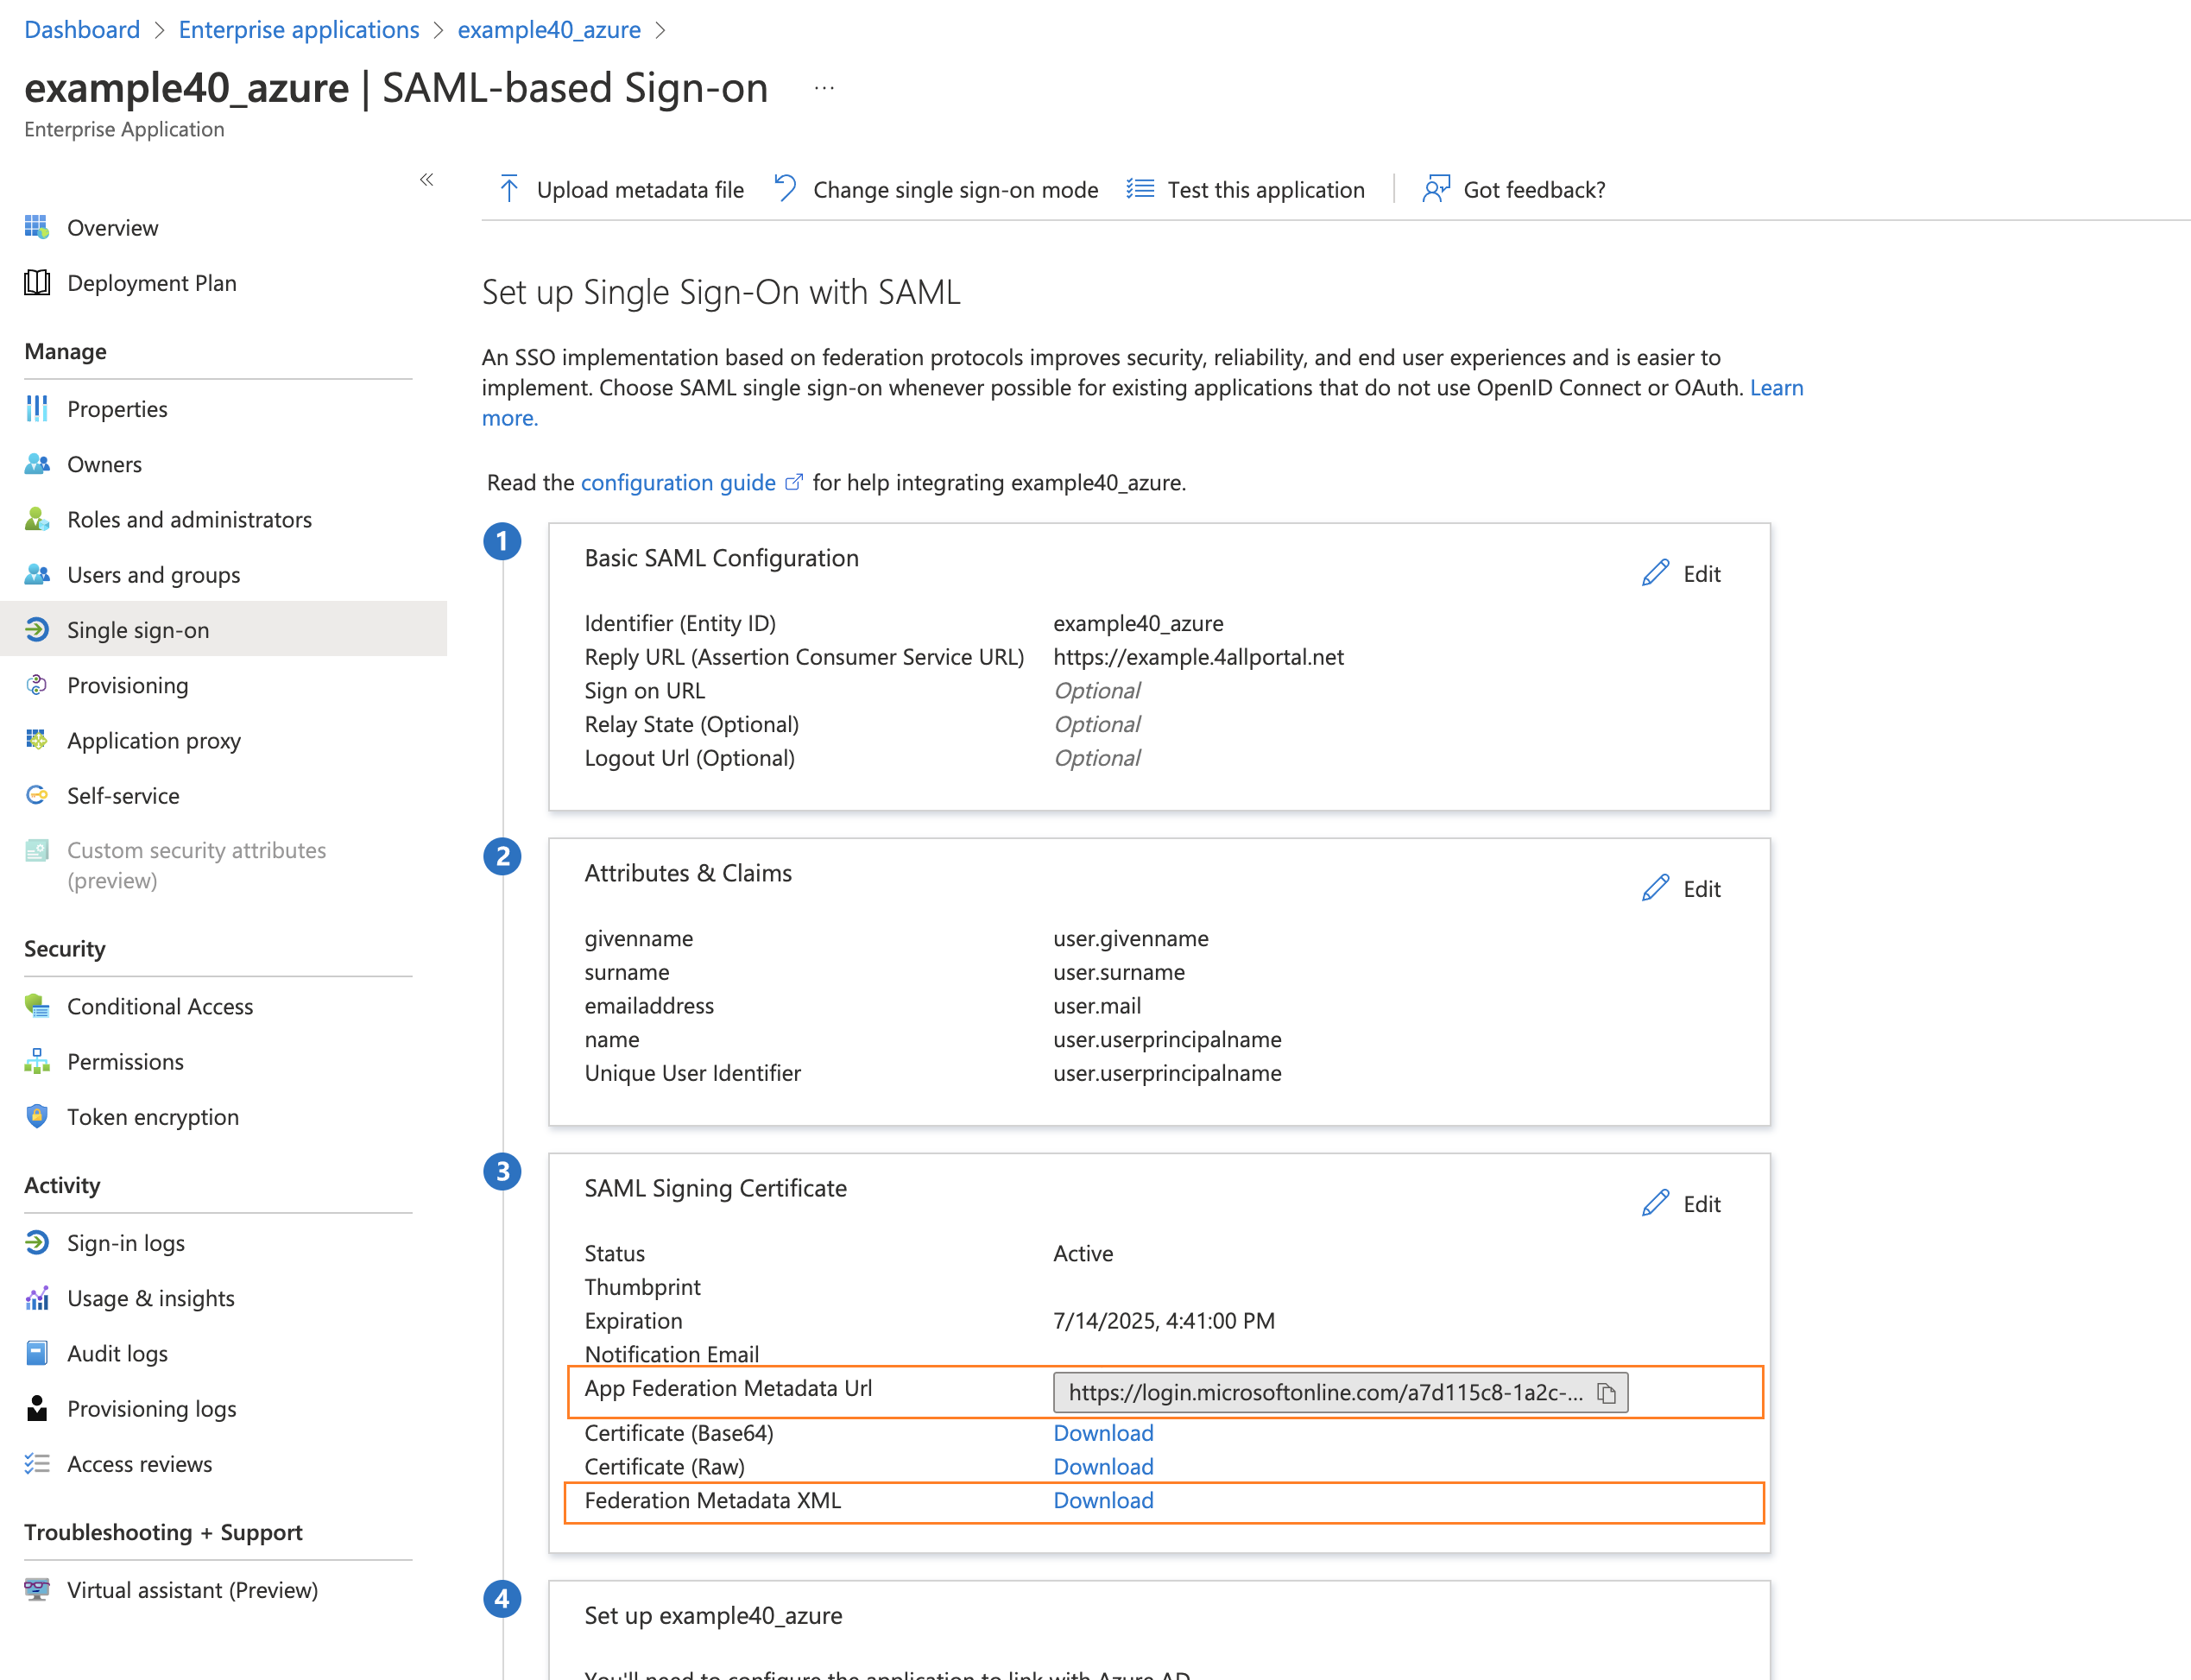
- Export the metadata from Azure:
- Import the metadata from 4ALLPORTAL (Relying Party):

- Result after importing metadata:
Set access permissions for SAML for either users or groups to allow users to log in via SAML.
Finish your Azure configuration. Give either the
Metadata URLorMetadata Fileto the 4ALLPORTAL responsible. The next steps are back in the 4ALLPORTAL.
# Complete Configuration in 4ALLPORTAL
The last steps can be done as soon as the person who configured Azure externally provided either Metadata URL or Metadata File.
- Go back to your Asserting Party in admin snap-in
Authentication/SAML2 Asserting Party (IDP). - Set
Metadata URLof the Asserting Party, e.g.https://login.microsoftonline.com/a7d115c8-1a2c-....
Or use theMetadata Fileinstead of the URL if you wish or in case the URL is not accessible.
Or fill all advanced fields below. - In
Mappings, setDefault role ID, e.g. toUser. - Add mapping to
Mapping of user fields. Assign CoreEngine FieldExternal IDto External Fieldhttp://schemas.microsoft.com/identity/claims/objectidentifier. - Configure CORS like described in the basic SAML configuration here.
- Reload 4ALLPORTAL.
- Test your configuration and login to 4ALLPORTAL with the new provider.
Troubleshooting
If any problems occur during configuration or when logging in, look for help here.
# Optional: Map Additional Attributes
With the configuration described above, only attribute user.external_id in 4ALLPORTAL will be set to http://schemas.microsoft.com/identity/claims/objectidentifier from Azure. This is sufficient for login, but a user will contain no further information.
If you want to map additional attributes, you may add attributes to your mapping in admin snap-in Authentication/SAML2 Asserting Party (IDP) e.g. like this:
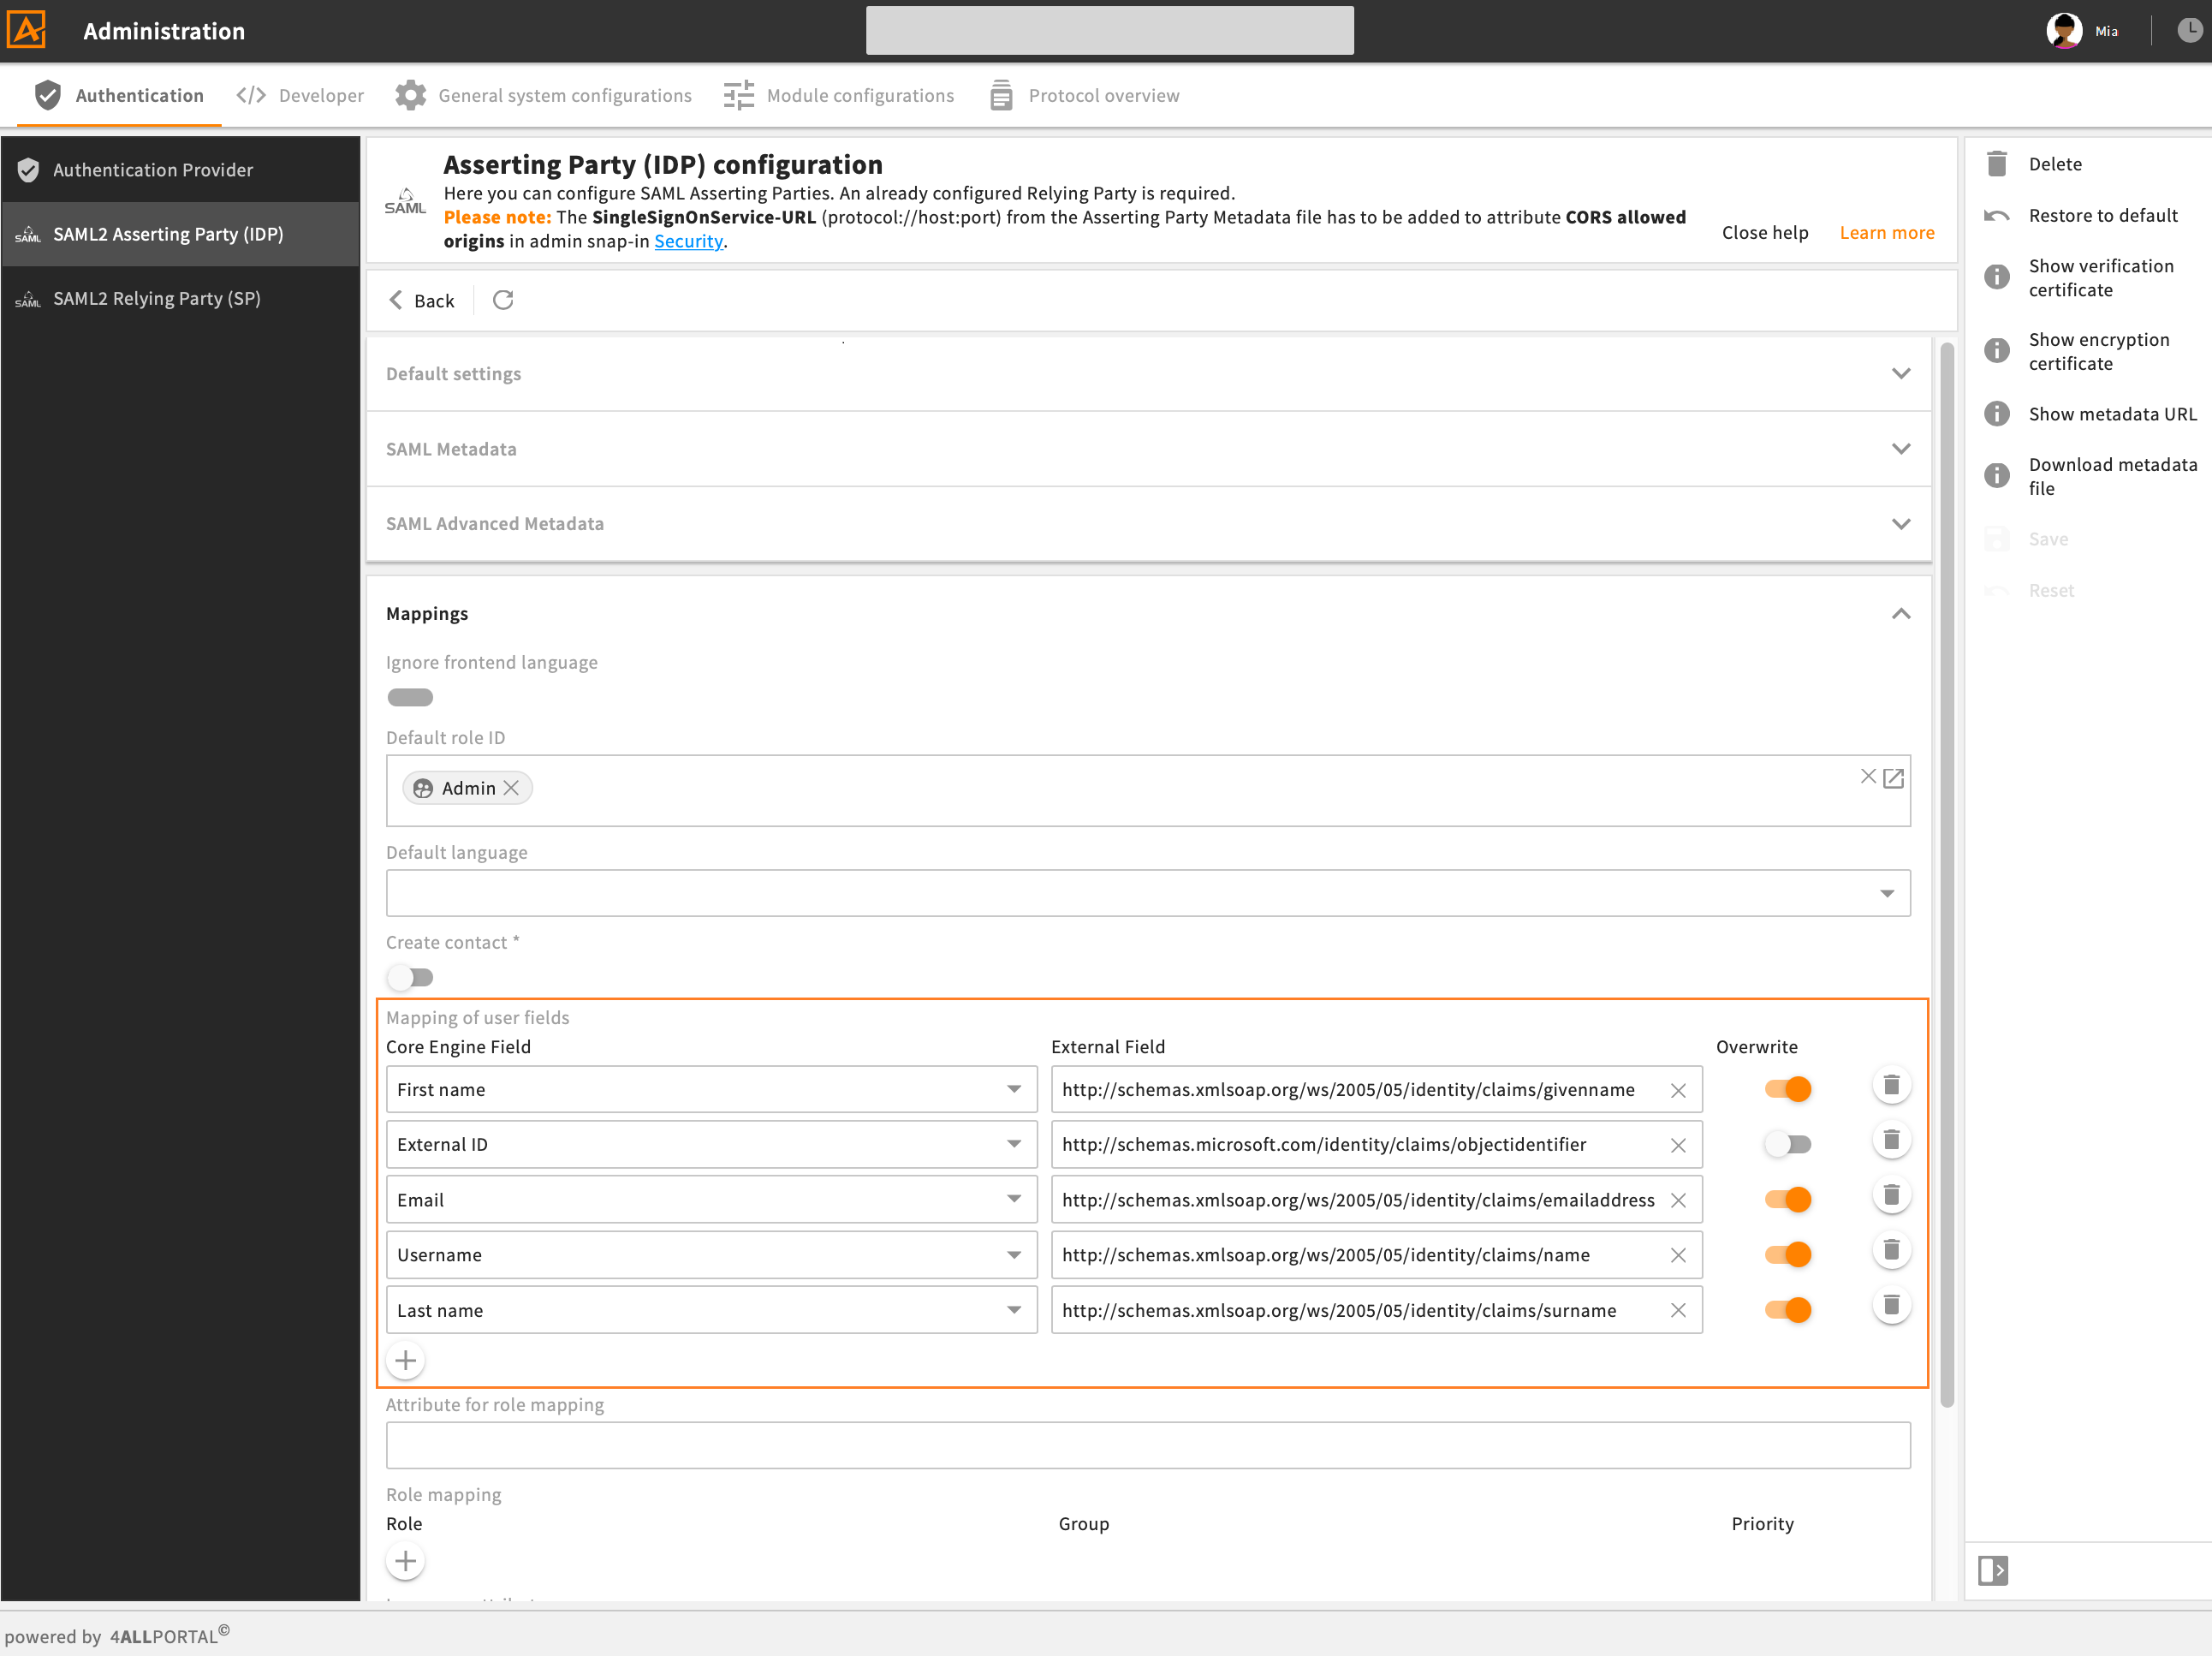
example for mapping of user fields in 4ALLPORTAL
Show SAML attributes
If you do not know the names of required attributes, use URL {baseUrl}/saml2/info to show SAML attributes after a valid login.