# SAML 2.0 Basics and Configuration
The SAML 4.0 functionality is integrated to 4App Core Engine from version 4.0.
For lower Core Engine versions, separate 4Apps Authentication Base (opens new window) and Authentication Provider SAML (opens new window) are required.
After upgrading to 4.0, note the following:
- Remove old 4Apps
Authentication BaseandAuthentication Provider SAML - Old configurations can be removed or remain, as new configurations are stored in new folder "saml2"
- Set up a new configuration for SAML
# SAML Preconditions
For SAML to work correctly, the 4ALLPORTAL must be accessed via HTTPS and the backend must know about this. If the proxy you use does not pass on this information automatically, it must be configured accordingly.
# Configure X-Forwarded-Proto
A proxy that terminates SSL must set the X-Forwarded-Proto header. For example, if Apache HTTP is used, you may need to make the following setting:
RequestHeader set "X-Forwarded-Proto" expr=%{REQUEST_SCHEME}
For other proxies, please take a look at the corresponding proxy documentation.
Please note: Make sure the X-Forwarded-Proto header is not deleted by any proxy automatically.
# SAML Basics
SAML (Security Assertion Markup Language) is a standard protocol for integrating web-based systems with an Identity and Access Management system.
The SAML2 integration allows the 4ALLPORTAL to access an identity management using the SAML protocol. This allows to login to the 4ALLPORTAL using a user's identity stored centrally in the identity management (e.g. in Microsoft ADFS). This is not only faster, but also more secure.
When logging in to the 4ALLPORTAL for the first time, the data stored for a user in the identity management is used to automatically create or update a user in the 4ALLPORTAL.
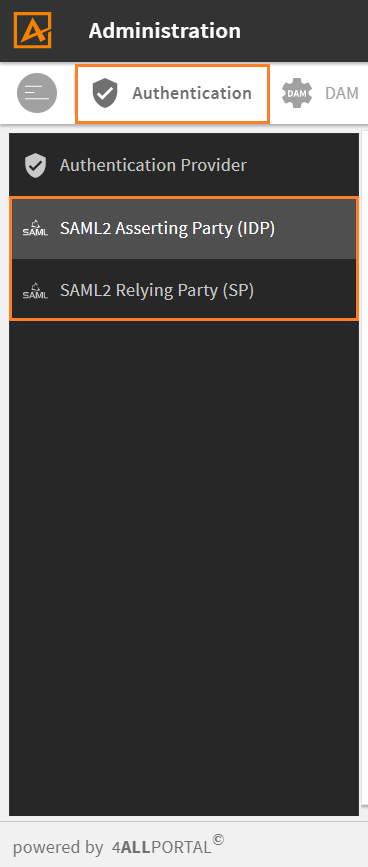
To configure a login using SAML, two admin snap-ins are available:
Authentication/SAML2 Asserting Party (IDP)Authentication/SAML2 Relying Party (SP)
# Relying Party and Asserting Party
- Relying Party: Service Provider (SP) = application to which access should be provided, e.g. the 4ALLPORTAL
- Asserting Party: Identity Provider (IDP) = central user database with the stored user information, e.g. Microsoft ADFS
The SAML 2.0 authentication provider enables external systems to access the 4ALLPORTAL via one or several Asserting Parties (Identity Providers). For this, the 4ALLPORTAL is configured as Relying Party (Service Provider).
The Asserting Party(s) refer to one Relying Party. Like this it's possible to use one Relying Party for multiple Asserting Parties. Examples of external systems include user logins to the Windows Active Directory and a customer-specific CMS system that supports SAML.
Depending on an Asserting party's functions, an authentication using a central login consisting of username and password and/or further login methods (e.g., Windows Authentication with single sign-on) are possible.
Multiple Relying Parties
The 4ALLPORTAL supports multiple Relying Parties. This enables to use different certificates (configured per Relying party) for different identity providers.
# Supported Identity Providers
The 4ALLPORTAL has been tested with the following Identity Providers:
- Microsoft Active Directory Federation Services (ADFS) (ADFS configuration guide)
- Microsoft Azure Active Directory (Azure configuration guide)
- Okta (Okta configuration guide)
- CyberArk (CyberArk configuration guide)
- Keycloak
Other Identity Providers based on the SAML protocol are possible.
# Security
For a secure connection, Relying Party and Asserting Party(s) should always communicate via HTTPS.
When mixing HTTP and HTTPS, various errors may occur. For example, Chrome sends null for CORS origin, and the access from the Identity Provider to the 4ALLPORTAL is blocked.
# SAML Configuration
To configure SAML, you need to configure one (or multiple) Relying Parties (your 4ALLPORTAL) and one or more Asserting Parties in the 4ALLPORTAL, depending on your used service(s).
Relying Party and Asserting Party can be configured in admin snap-ins Authentication/SAML2 Asserting Party (IDP) and Authentication/SAML2 Relying Party (SP).
All changes made in the snap-ins will be stored in subfolders of custom/global/authentication_provider/saml2:
| folder/file | description |
|---|---|
| asserting_party/{ASSERTING_PARTY_NAME}.xml | configuration file for the Asserting Party (one file for each configured) |
| relying_party/{RELYING_PARTY_NAME}.xml | configuration file for the Relying Party (one file for each configured) |
| metadata/asserting_party/{ASSERTING_PARTY_NAME}/metadata.xml | metadata file for the Asserting Party, if configured |
| variable | name in admin snap-in |
|---|---|
| ASSERTING_PARTY_NAME | RegistrationId |
| RELYING_PARTY_NAME | Relying Party ID |
Configuration Request and Metadata Refresh
A metadata refresh happens after 60 minutes (60 minutes interval). On server startup or reload the full SAML configuration (including the metadata) will be loaded.
# Relying Party (SP) Configuration
To configure the Relying Party, use admin snap-in Authentication/SAML2 Relying Party (SP) in the administration area:
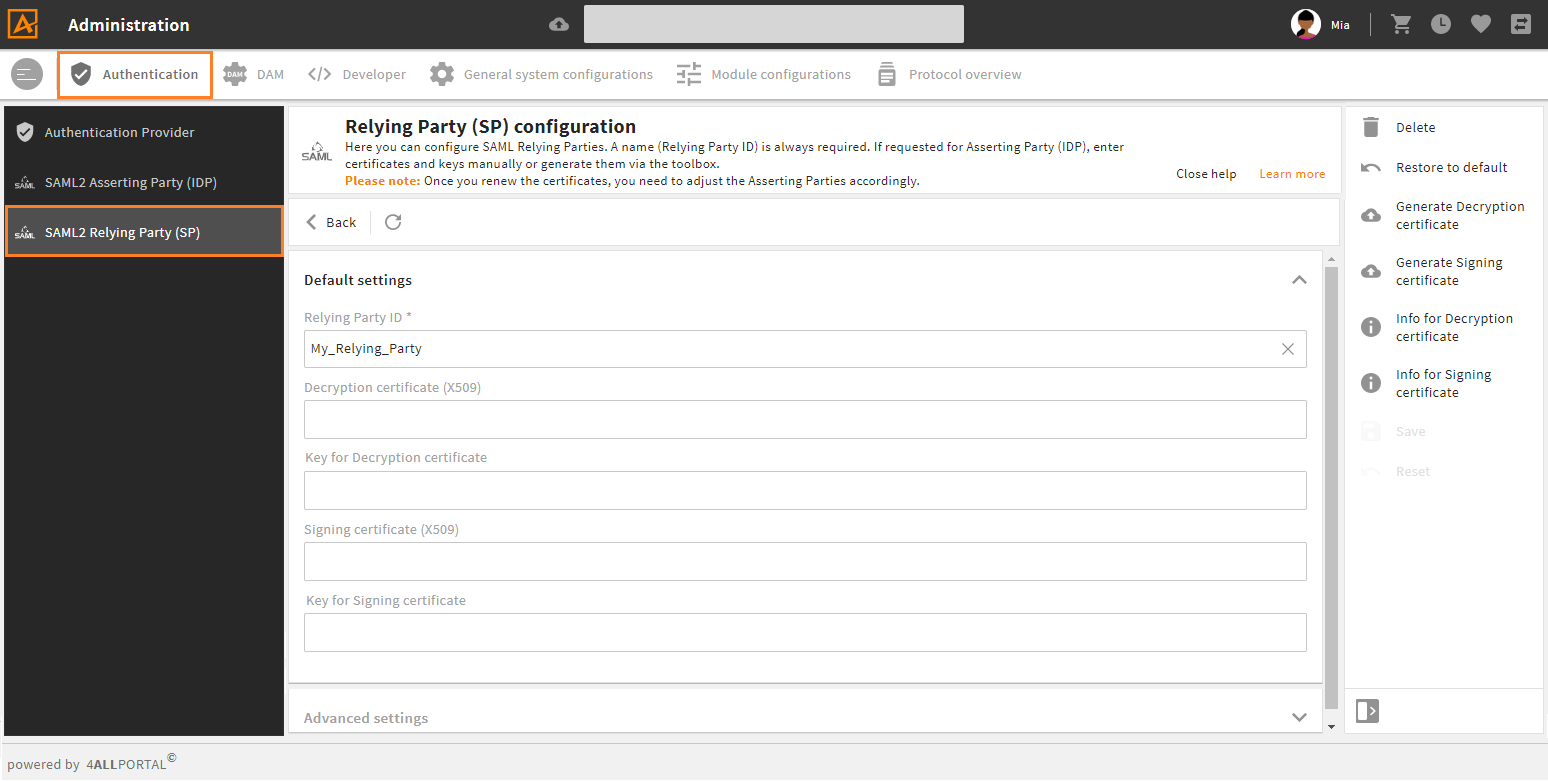
- Click "Create" in the toolbox.
- Required: Set
Relying Party IDas the identifier for this Relying Party (naming rules see below). - Save your Relying Party.
Optional: Only if required from your Asserting Party(s), the following certificate(s) and keys must be defined:
- Decryption certificate (X509) - You may use the same for
Signing certificate (X509) - Key for Decryption certificate
- Signing certificate (X509): - You may use the same as for
Decryption certificate (X509) - Key for Signing certificate
Create a certificate with its corresponding key either automatically via toolbox action Generate Decryption certificate/Generate Signing certificate, or paste a specific certificate and key to their fields manually.
Please note: As soon as you generate new certificates/keys for a Relying Party already referred to by an Asserting Party, you need to reconfigure the Asserting Party:
| Asserting Party | Description |
|---|---|
| Keycloak | The server.pem generated during certificate creation can be imported in the Keycloak console, tab "SAML Keys". |
| Windows ADFS | The server.pem must be converted with: openssl x509 -outform der -in server.pem -out win.cer.Afterwards, this certificate can be uploaded via the AD FS Management/Relying Party Trusts in tabs Encryption and Signature. |
Certificate Duration
Note that certificates generated via the toolbox are valid for one year.
You can as well use a self-generated certificate with a long runtime for Decryption certificate (X509) and Signing certificate (X509). The Asserting Party will get these certificates via the Relying Party metadata.
# Snap-in Details (Relying Party)
Default Settings
| field | description |
|---|---|
| Relying Party ID * | Identifier for the Relying Party. Name must start with a letter. Subsequent characters can be letters, numbers and underscore _. One Relying Party is selected in Asserting Party configuration. |
| Decryption certificate (X509) | Certificate for Decryption. Possible the same as Signing certificate (X509) |
| Key for Decryption certificate | Key for Decryption certificate (X509) |
| Signing certificate (X509) | Certificate for signing. Possible the same as Decryption certificate (X509) |
| Key for Signing certificate | Key for Signing certificate (X509) |
* field is a required field
Advanced Settings
Advanced settings provide options to customize if required - not for standard configurations.
| field | default value | description |
|---|---|---|
| EntityId | {baseUrl}/saml2/service-provider-metadata/{registrationId} | Allows to change the entity id |
| AssertionConsumerServiceLocation | {baseUrl}/login/saml2/sso/{registrationId} | Allows to change the default value |
| AssertionConsumerServiceBinding | POST | Allows to choose POST or REDIRECT |
| NameIdFormat | Allows to set the NameIdFormat |
# Multiple Relying Party URLs
In most cases it is not necessary to manually configure a URL for the Relying Party, because the URL contains the variable {baseUrl} which is replaced by the caller URL. {baseUrl} contains protocol, host and port. If you access the 4ALLPORTAL with https://example1.4allportal.com and generate metadata for the Relying Party, this metadata is only for this specific URL. The SAML login will not work with another URL.
It is also possible to generate metadata for https://example2.4allportal.com, but this requires another configured Asserting Party provider. Please note that per Asserting Party, one user will be created in 4ALLPORTAL.
# Relying Party Certificate Files
When installing the Asserting Party, it receives certificates via the metadata. As soon as the Relying Party certificates expire, they must be updated on the Asserting Party, too.
# Asserting Party (IDP) Configuration
The configuration of the Asserting Party must take place in the 4ALLPORTAL as well as in the external Identity Provider (e,.g., Azure).
# Generate Asserting Party in the 4ALLPORTAL
To generate an Asserting Party in the 4ALLPORTAL, use admin snap-in Authentication/SAML2 Asserting Party (IDP) in the administration area:
- Click "Create" in the toolbox.
- Required: Set
RegistrationId (Name)as the identifier for this Asserting Party (naming rules see below). This name is also displayed on the login screen for selection. - Required: Select the
Relying Party(must have already been generated). - Save the Asserting Party.
- Reload/Restart your 4ALLPORTAL.
After creating the Asserting Party, the information for the external IDP's configuration can be determined:
- Relying Party URL: Click toolbox action "Show metadata URL" and copy it.
- Relying Party metadata file: Download the metadata file via toolbox action "Download metadata file" in the Asserting Party's admin snap-in.
# Configure Identity Provider Externally
- Give the required information to the customer/system owner.
- The customer/system owner needs to configure the IDP in their Azure, Active Directory, KeyCloak etc., using the Relying Party URL/Relying Party metadata file generated. Note that this cannot be done in the 4ALLPORTAL.
- The customer/system owner needs to send the resulting Asserting Party's metadata URL or Asserting Party's metadata file to an 4ALLPORTAL administrator to finish the configuration in the 4ALLPORTAL.
Asserting Party Configuration Guides
# Finish Asserting Party Configuration in the 4ALLPORTAL
- You need to configure CORS and allow the URL from attribute
locationof elementSingleSignOnServicefrom the Asserting Party metadata. For this, go to admin snap-inGeneral system configurations/System settings/Security, fieldCORS allowed origins.
Please note: If CORS related errors occur, take a look here. - Go back to admin snap-in
Authentication/SAML2 Asserting Party (IDP). - In panel
SAML Metadata, set eitherMetadata URLorMetadata fileor all following parameters from panelSAML Advanced Metadata(if not set before).
Please note: Filling fields from panelSAML Advanced Metadatais not required when settingMetadata URL/Metadata file. Information from these fields will overwrite the information fromMetadata URL/Metadata file, which can be required in special cases. - If required, configure further parameters.
- Reload or restart 4ALLPORTAL.
- Test your configuration at login.
# Snap-in Details (Asserting Party)
Note that in groups Default settings and Mappings, some general authentication configurations are done which are not described here (e.g., Visible). Look for detailed information in general authentication documentation here.
# Default Settings
| field | description |
|---|---|
| RegistrationId (Name) | Identifier for this Asserting Party. Name must start with a letter. Subsequent characters can be letters, numbers and underscore _.Authentication provider's name used in filesystem, database (table user field connector), and for SAML login. Must not be changed after a working configuration has been established. |
| Relying Party | Select a previously created Relying Party. |
| Clock skew in minutes | Set CLOCK_SKEW if the validity of the SAML message is too short. Allows to fix problems with time differences between Asserting Party and Relying Party. Default: 5 minutes. |
| Show attributes | Allowed values: true, false. After a successful login, the attribute names are shown in the log. Set to "true" only during configuration if you do not know with which names attributes are transferred. |
# SAML Metadata
| field | description |
|---|---|
| Metadata URL | Enter the URL to the metadata of the Asserting Party here. |
| Metadata file | Upload the Metadata file here. It is used as the fallback configuration if the Metadata URL cannot be accessed or does not work. If also the Metadata file does not work, the configuration from (optional) SAML Advanced Metadata is used. |
# SAML Advanced Metadata
Note that filling fields from panel SAML Advanced Metadata is only for special cases or a complete manual configuration and not required when setting Metadata URL/Metadata file. Information from these fields will overwrite the information from Metadata URL/Metadata file.
The configuration made here is also a fallback in case both Metadata URL and Metadata file do not work.
| field | description |
|---|---|
| Verification certificate (X509) | Paste the verification certificate here. If set here, it will be added to the certificate from metadata. |
| Encryption certificate (X509) | Paste the encryption certificate here. If set here, it Will be added to certificate from metadata. |
| Authentication contexts | List of authentication contexts allowed to use when authenticating a user (more details). Default: empty. |
| EntityId | Usually set from Asserting Party metadata by URL or file. Allows to overwrite that value. Required for a complete manual configuration. |
| WantAuthnRequestsSigned | Usually set from Asserting Party metadata by URL or file. Allows to overwrite that value. Required for a complete manual configuration. |
| Signature Algorithm | Usually set from Asserting Party metadata by URL or file. Allows to overwrite that value. Defaults to http://www.w3.org/2001/04/xmldsig-more#rsa-sha256 if not set from metadata. |
| Single sign-on ServiceLocation | Usually set from Asserting Party metadata by URL or file. Allows to overwrite that value. Required for a complete manual configuration. |
| Single sign-on Service Binding | Usually set from Asserting Party metadata by URL or file. Allows to overwrite that value. Required for a complete manual configuration. |
# Role Mappings
For mapping details, look at the general authentication documentation here. Note that the field order may differ.
The following mapping field is SAML specific:
| field | description |
|---|---|
| Attribute for role mapping | This SAML-specific attribute defines the role mapping to map users to a 4ALLPORTAL role (the different possibilities for mapping depends on the particular Asserting Party). |
Available Group Values
In field Group, you can enter all values your IDP (e.g. Azure, Okta ...) provides. To check available values, you can query them by adding "/saml2/info" to your system URL after successfully logging in (e.g. https://my-4llportal.cloud/saml2/info).
# Authentication Contexts
Allows the Relying Party to specify the login method that the Asserting Party should use. The order is relevant. If the Asserting Party does not support any of these, no login is possible.
In ADFS, urn:oasis:names:tc:SAML:2.0:ac:classes:Password allows to insert the password, even if the Asserting Party (IDP) uses Kerberos for Windows Authentication by default.
With urn:federation:authentication:windows as first value, an authentication with Kerberos is tried first.
# Asserting Party Certificate Files
# Manual Creation
To create a certificate (server.pem) and a private key (server.key) valid for 10 years, use this shell command:
openssl req -newkey rsa:2048 -new -nodes -x509 -days 3650 -keyout server.key -out server.pem
You can always choose the default value, except for Email Address, which requires a valid value with "@" for verification.
Use file server.pem for Decryption certificate (X509) and Encryption certificate (X509).
Use file server.key for the related key.
Please note: You can use one key and certificate for both Decryption certificate (X509) and Encryption certificate (X509) or create different ones if you wish.
# Convert Wrong Key Format
If your key file starts with -----BEGIN RSA PRIVATE KEY-----, this key is in format PKCS#1 and has to be converted to a PKCS#8 key file:
openssl pkcs8 -topk8 -inform PEM -in in.key -out server.key -nocrypt
# Add Certificate to Java Keystore (Metadata URL with HTTPS)
If the Metadata URL starts with https, and the certificate required to access this URL is not in the Java keystore, you can add it manually:
- Get the certificate for the Metadata URL with
openssl s_client -connect ${REMHOST}:${REMPORT} -servername HOSTNAME_OF_METADATA_URL - Save the contents from
-----BEGIN CERTIFICATE-----to-----END CERTIFICATE-----to fileurl.pem. - Install the certificate. More details.
New Java Versions
The manual installation into Java keystore leads to a problem, though: As soon as a new Java version is installed, the certificate must be reinstalled.
If the Metadata URL is not accessible, we thus recommend configuring it via the Metadata file is easier. But note that it must be updated manually before the certificates expire.
# Install into the Docker System
The certificate has to be installed into the keystore of the running Docker container:
- Start a Docker container.
- Copy keystore to a mount:
docker cp <containerId>:/usr/local/openjdk-17/lib/security /host/path/target - Mount folder
./securityto the/host/path/target. - Restart Docker.
- Add the certificate to the Java keystore as root user. Execute on host system:
keytool -import -alias ${certificateName} -file url.pem -keystore /host/path/target/cacerts -storepass changeit - Restart Docker container.
- Try SAML login.
# Login Screen
After your configuration is complete, you can customize the login screen. After you made changes, reload or restart your 4ALLPORTAL and check your login page.
# Set Icon and Text for Login Screen (Optional)
To configure the icon, just replace or copy your chosen SVG file to custom/global/styles/default/GLOBAL-AUTHENTICATION_PROVIDER-{$provider_name}.4apicon.
Define texts for the login page in a new file, e.g. custom/global/locale/en_US/saml_login.properties.
# Set Locale for Login Screen (Optional)
- locale keys
- L-GLOBAL-CONNECTOR-{$provider_name}
- L-GLOBAL-CONNECTOR-{$provider_name}-INFO
# Default and Chosen Provider
To define a default or chosen provider for login, please take a look at our general authentication documentation here.
# Troubleshooting
# Helpful Settings
If you face any problems during or after your configuration, try the following:
- Set log level: The SAML API logs some things with trace, therefore change the log level to
org.springframework.security=TRACE - Log SAML attribute names: To log the attribute names, activate
Show attributesin admin snap-inAuthentication/SAML2 Asserting Party (IDP) - Show SAML attributes: If you do not know the names of some attributes, use URL
{baseUrl}/saml2/infoto show SAML attributes after a valid login. - Check cookies: If your SAML login results with errors, you should check the following:
- If the URL start with
https, thesecureflag on the cookie is required. - Check whether you need to set the X-Forwarded-Proto header (more details).
- If the URL start with
- Check 4ALLPORTAL metadata file: To avoid problems, both the browser URL from which the metadata is generated and the entries
entityIDandLocationin the metadata file must start withhttps.- If the browser URL starts with
httpsbut the URLs in the metadata file are generated withhttp, consider the X-Forwarded-Proto header (more details).
- If the browser URL starts with
# CORS Errors
If a CORS related error occurs, search in the HTTP request origin header which URL has to be allowed in the security configuration.
Multiple redirects: If multiple redirects occur, multiple URLs may need to be entered for CORS to field CORS allowed origins in admin snap-in General system configuration/System settings/Security.
# Error Reading Metadata From URL
When reading metadata from URL, errors like Not possible to configure assertingParty [...] by metadata_url may occur in the logs.
If the Metadata URL configured in the Asserting Party admin snap-in starts with https and this URL is not reachable from Java (because the certificate is not in the keystore), make sure to allow access to Metadata URL.
Example log entry:
[ERROR] [2022-07-15 08:58:56,206] [reload-1] c.c.c.a.s.RelyingPartyRegistrationRepositorySaml Not possible to configure assertingParty {registrationId} by metadata_url ${metadataUrl}
org.springframework.security.saml2.Saml2Exception: javax.net.ssl.SSLHandshakeException: PKIX path building failed: sun.security.provider.certpath.SunCertPathBuilderException: unable to find valid certification path to requested target
at org.springframework.security.saml2.provider.service.registration.RelyingPartyRegistrations.fromMetadataLocation(RelyingPartyRegistrations.java:86) ~[spring-security-saml2-service-provider-5.7.2.jar:5.7.2]
# Error "Did not Decrypt Response"
If an error Did not decrypt response [...] since it is not signed occurs in the logs (this happens at least with AD FS installed on Windows Server 2012 R2), the IT responsible has to execute the following in an admin powershell:
Set-ADFSRelyingPartyTrust -TargetName {specific display name} -SamlResponseSignature "MessageAndAssertion"
"Specific display name" is the name which was inserted during the AD FS configuration, e.g. example40_adfs:
Set-ADFSRelyingPartyTrust -TargetName example40_adfs -SamlResponseSignature "MessageAndAssertion"
Example log entry:
[ERROR] [2022-09-08 08:43:42,685] [http-nio-8181-exec-46] c.c.c.a.s.Saml2LoginSettings$1 Failed to process authentication request
org.springframework.security.saml2.provider.service.authentication.Saml2AuthenticationException: Did not decrypt response [_46cfe45e-fa70-4b04-8e59-a7ed114da186] since it is not signed
 at org.springframework.security.saml2.provider.service.authentication.OpenSaml4AuthenticationProvider.createAuthenticationException(OpenSaml4AuthenticationProvider.java:697) ~[spring-security-saml2-service-provider-5.7.2.jar:5.7.2]
# API Endpoints
- Login to Asserting Party with:
{baseUrl}/saml2/authenticate/{registrationId} - Generate metadata for Asserting Party with:
{baseUrl}/saml2/service-provider-metadata/{registrationId} - Default method from API to generate metadata for Asserting Party:
{baseUrl}/saml2/service-provider-metadata-api/{registrationId}
Please note: Only works if Metadata URL or Metadata file are set for Asserting Party. Therefore, it is easier to use the URL without-api. - Redirect after login to:
{baseUrl}/login/saml2/sso/{registrationId} - Output transferred SAML attributes after a valid login:
{baseUrl}/saml2/info